Performing instant recovery
Perform instant recovery after a VM fails. If the VM has not failed, you can use audit mode to verify that the VM can be created from a backup. (See Perform instant recovery in audit mode for details.)
Be sure to shut down the original VM before running this procedure.
Run this procedure from the backup appliance to recover from a backup or imported backup copy. Run this procedure from the backup copy target appliance to recover from a hot backup copy.
1. Log in to the backup appliance or target appliance (if recovering from a hot backup copy).
2. Select Recover and click the Backup Catalog tab.
(Optional) Use Filter Backups to the right to customize the backups that display. For details, see Working with custom filters.
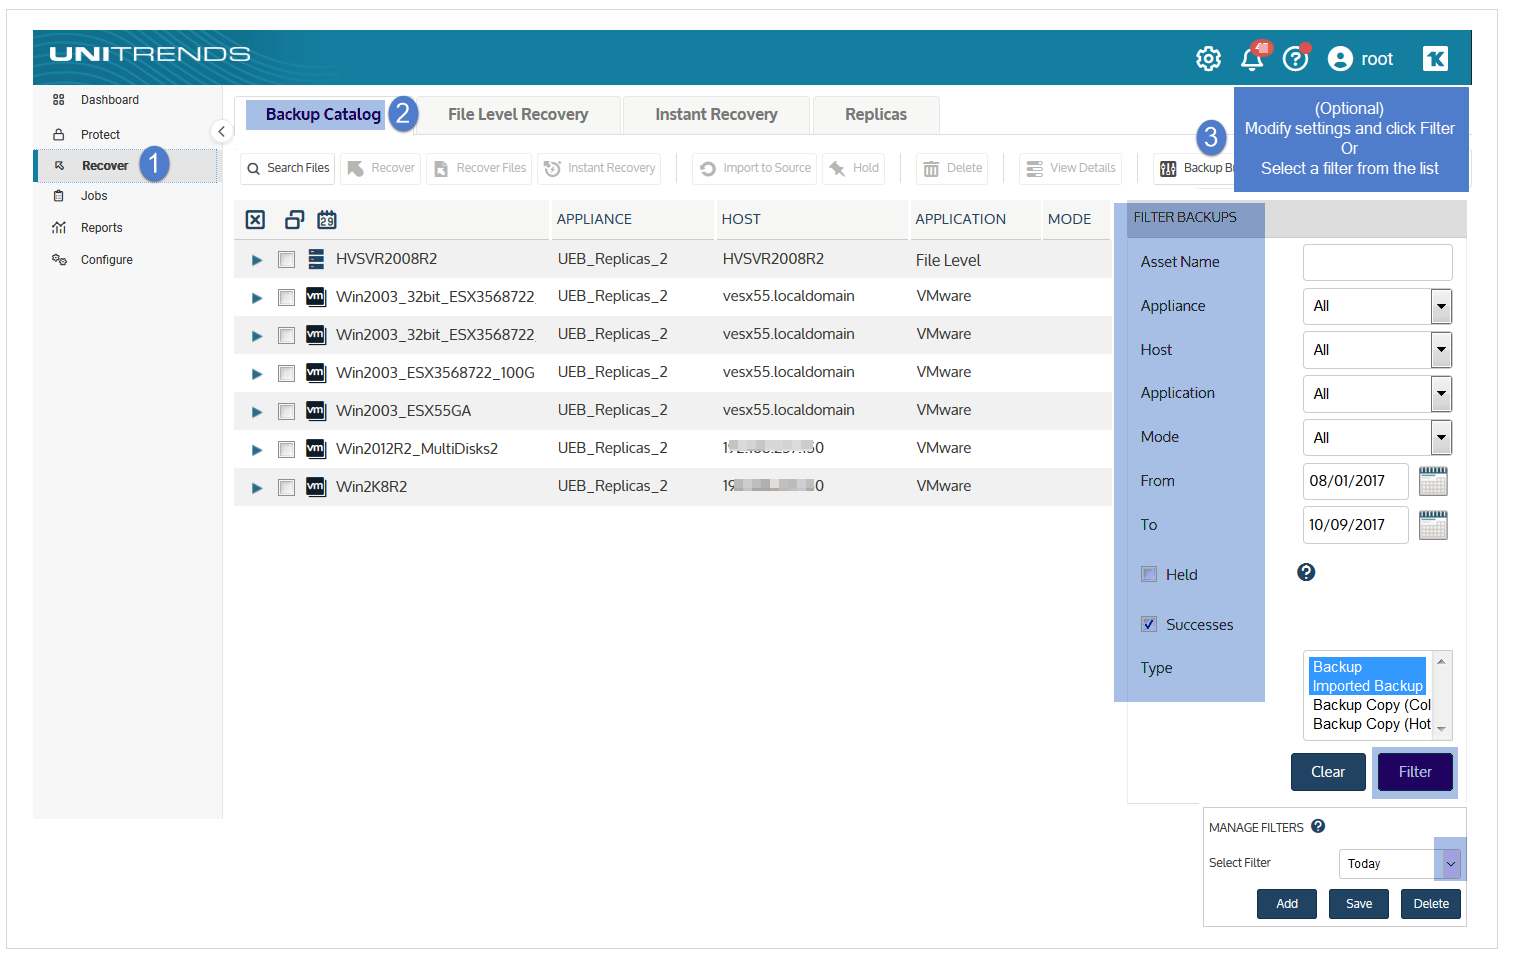
3. Expand the VM asset and select one of the following to use for the recovery:
● A host-level backup.
● An imported host-level backup copy. (To import a backup copy, see To import a cold backup copy or To import a hot backup copy.)
● A hot backup copy (supported if performing IR on the target appliance where the hot copy resides).
4. Click the Instant Recovery button.

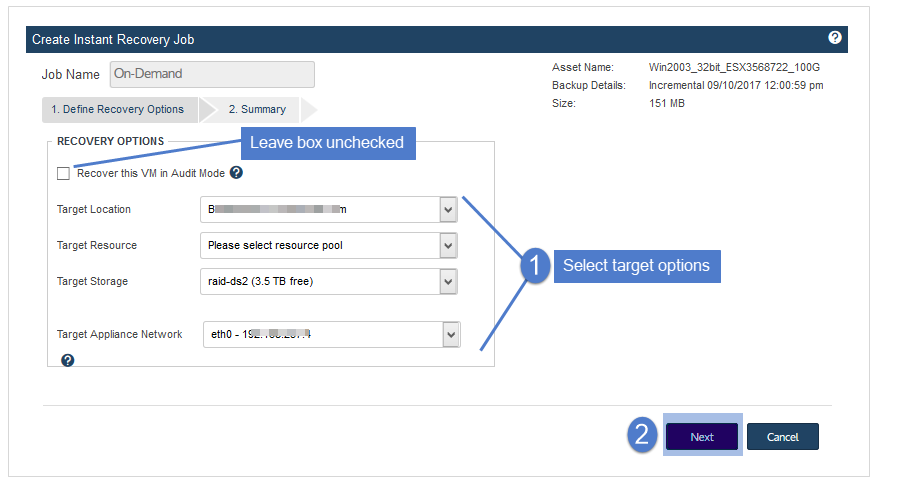
5. Do not check the Recover this VM in Audit Mode box.
This box must be unchecked to recover the failed VM with its original network settings.
NOTE If the VM has not failed, you can do the recovery in audit mode by checking this box. See Perform instant recovery in audit mode for details.
6. Select these recovery options:
|
Recovery Options |
Description |
|---|---|
|
Target Location |
Select the host where the VM will be recovered. The list contains hosts that have been added to the appliance and are compatible with the VM being recovered. Incompatible hosts do not display in the list. ● To add a host, see Adding a virtual host. ● For Hyper-V clusters – To create a clustered VM, you must select a cluster as the target Hyper-V host. |
|
Target Resource |
(Optional) Select a resource pool. This field displays only if the Target Location is an ESXi host that has resource pools. |
|
Target Storage |
Select a datastore (ESXi host) or volume (Hyper-V host). |
|
Target Appliance Network |
Select a network adapter on the appliance to use for the recovery. eth0 is selected by default. If your appliance is configured with multiple adapters, you can opt to select a different adapter from the list. The appliance uses the selected adapter for communication with the hypervisor during the storage migration. |
|
Target Network Switch |
For Hyper-V hosts only, select the target network switch. ● This field displays only when recovering to a Hyper-V host. ● For Hyper-V clusters – If recovering a clustered VM, be sure to select a switch that is common to all nodes in the cluster. |
7. Click Next.
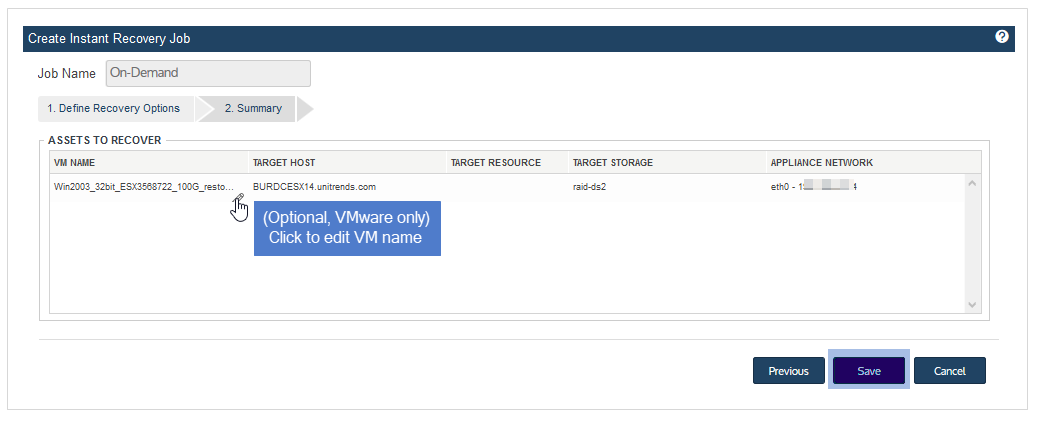
8. Review the recovery settings.
● A recovered VMware VM is created with the following default name: <original_VM_name>_restore. To change this name, click the pencil icon.
● A recovered Hyper-V VM is created with the same name as the original VM and no suffix. Due to Hyper-V limitations, it is not possible to rename the VM during the recovery, and the original VM is overwritten by the recovery operation if it resides on the recovery target.
9. Click Save to start the recovery.
10. Click OK to close the Information message.
The recovery object and new VM are created, and data migration begins. During this time, the VM is fully operational.
IMPORTANT Do not tear down the recovery session or modify the VM in any way until the data migration completes.
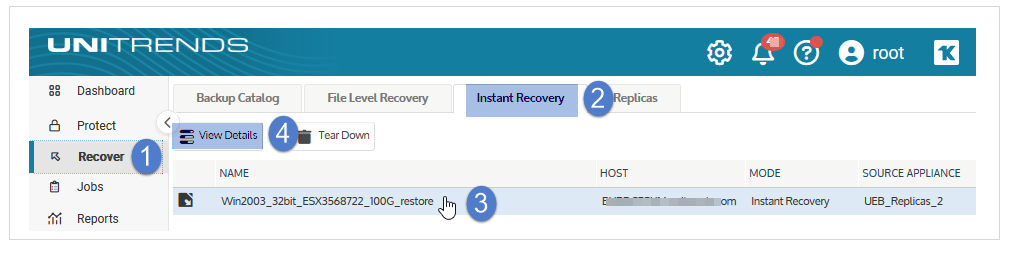
11. Check IR progress on the Instant Recovery tab:
● Click the Instant Recovery tab. Active IR sessions display by VM name.
● Click to select the IR session you created.
● Click View Details above.
● Status messages display in the Details tab below. IR moves through several phases. Data migration is complete when you see this message: VM is available for use.
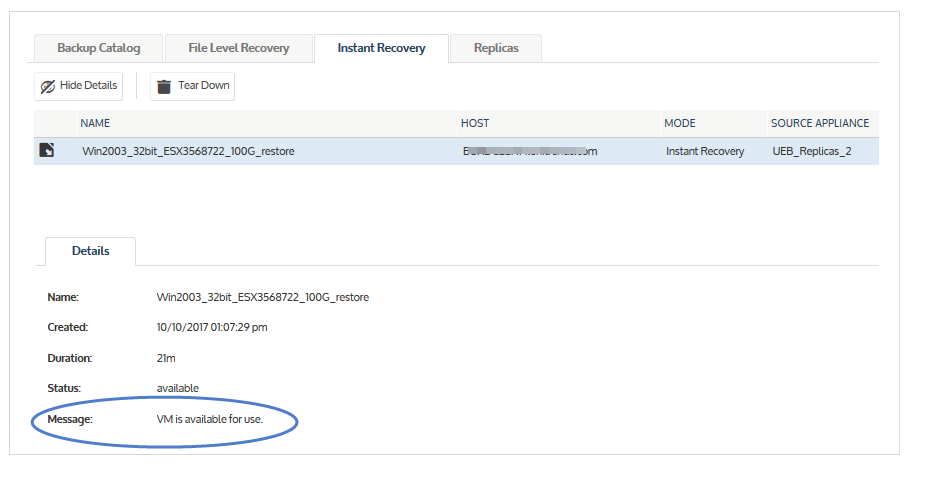
12. When you see the VM is available for use message, all data has been migrated and IR is complete.
● The recovered VM has the same network settings and username/password credentials as the original VM. For details on other settings, see VM configuration (VMware) or VM configuration (Hyper-V).
● Access the VM and verify that it is functioning as expected in production.
NOTES
● Windows server VMs - In rare instances, after a restore is performed for a Windows server VM, a disk may be inaccessible because it has been placed in an offline state. To bring disks into an online state, login to the VM, go to Disk Management, right-click on the offline disk, and select Online from the drop-down menu.
● Debian VMs - In some instances, Gnome might not start after a Debian VM is recovered. You can resolve this issue by rebooting the VM or restarting Gnome from the console. To access the console, enter Ctl+Alt+F1 and log in as root. Then run startx.
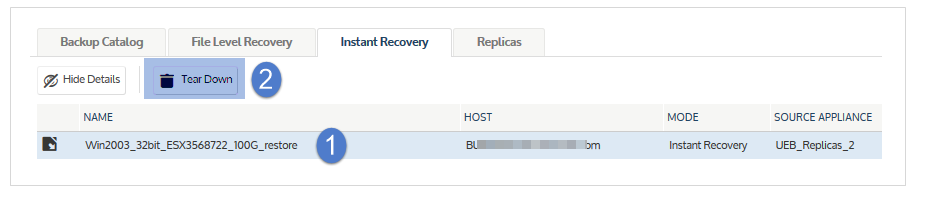
13. Tear down the IR session:
● On the Instant Recovery tab, click to select the IR session.
● Click Tear Down.
● Click Confirm.
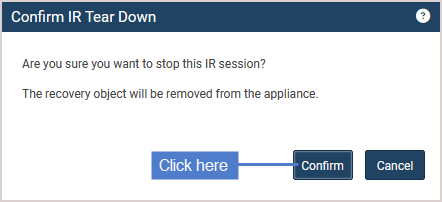
The session is removed from the appliance and no longer displays on the Instant Recovery tab. The IR VM is retained on the hypervisor.
14. Modify VM settings and backup schedules as needed to begin protecting the recovered VM. The next backup of the recovered VM is promoted to a full.


