Integrating VSA 9
Use these procedures to integrate your VSA 9 SaaS or on-premise instance with the UniView Portal.
NOTES
● SaaS instance managed by Kaseya – If you are using a SaaS VSA instance that is managed by Kaseya, do not run these VSA integration procedures. Instead, work with Support or your Evaluation Engineer to perform the VSA integration.
● These integration procedures apply to VSA 9 only. Do not use these procedures for VSA 10. For VSA 10, see Integrating VSA 10.
● Conditional alarms for an on-premise instance that is not accessible on the Internet – UniView Portal requires Internet access to push alarms to the VSA. If your VSA is not connected to the Internet, you cannot add UniView Portal conditional alarms to the VSA instance.
If you have already integrated VSA 9, use these steps to remove the UniView TAP module from your VSA instance.
NOTES
● You must remove the existing TAP module before installing the latest UniView TAP module.
● If the logos and branding you see in your currently deployed VSA module do not look like this new UniView module, you may be using a prior version of the TAP module for the Unitrends Backup Portal platform. As of January 2023, module branding has been modified, but no other functional changes exist. We do not recommend customers uninstall the older module to use the newer module as this will impact existing mappings (e.g., UniView user accounts mapped to KaseyaOne accounts for single sign-on, and assets mapped to VSA IDs).
- Log in to the VSA UI.
NOTE Do not use a VSA URL that includes -cdn. Use the URL that goes directly to your VSA server instance.
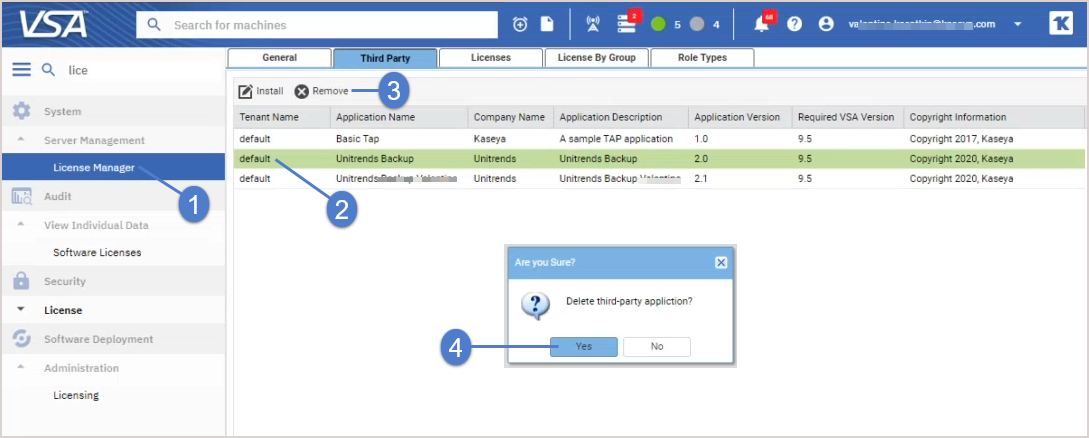
- Select System > Server Management > License Manager > Third Party.
- Select the row containing UniView, Unitrends Backup (older versions), or Unitrends MSP (older versions).
- Click Remove, then Yes to confirm.
- Log in to the UniView Portal as a superuser.
- Click
 :
:
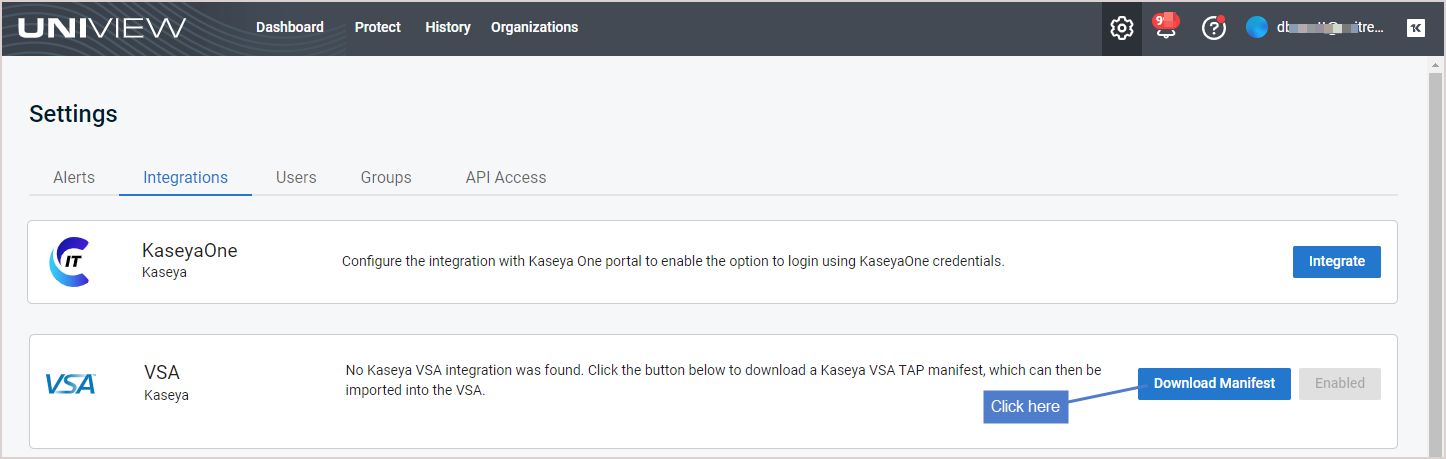
- Select the Integrations view.
- Locate the VSA integration and click Download Manifest. The UniView TAP module, UniView.vsaz, is downloaded.
- Use these steps to add the UniView TAP module to the VSA:
- Log in to the VSA UI. (Do not use a VSA URL that includes -cdn. Use the URL that goes directly to your VSA server instance.)
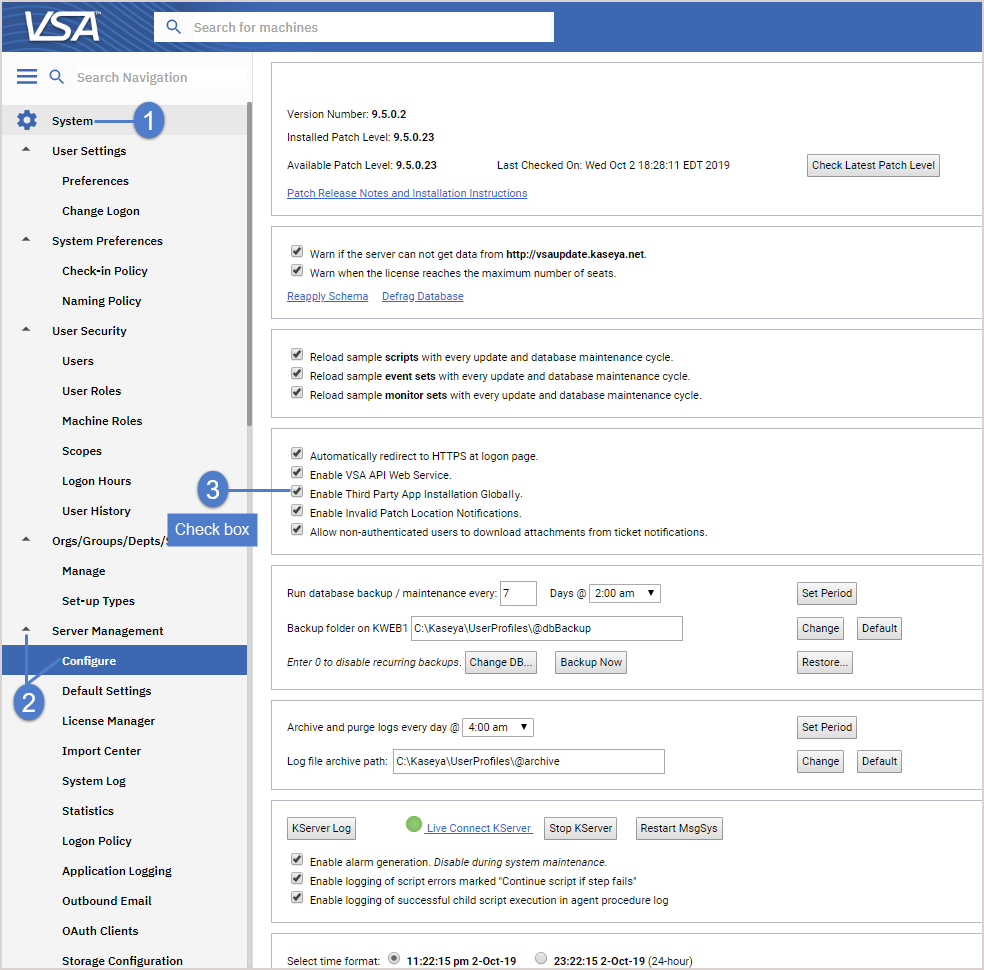
- On-premise instance only – Select System > Server Management > Configure and make sure you have checked this box: Enable Third Party App Installation Globally. (Skip this step if you have a SaaS VSA instance.)
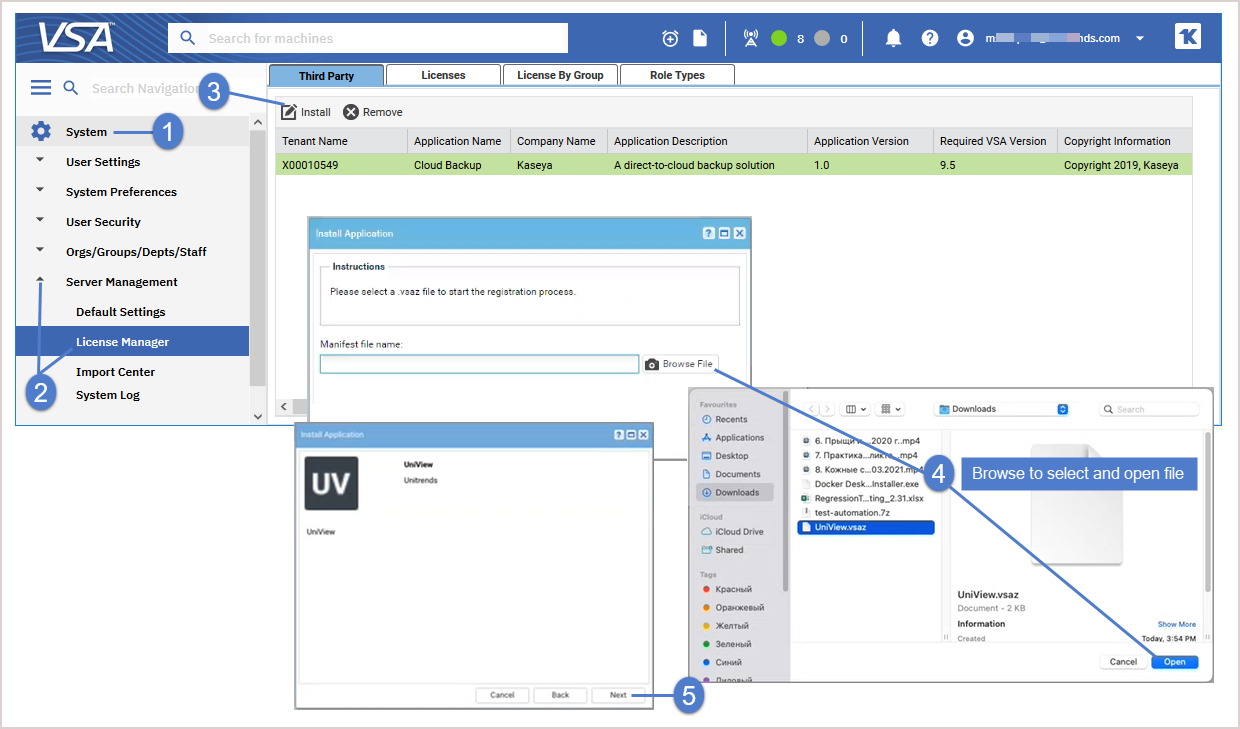
- Select System > Server Management > License Manager > Third Party > Install.
- Click Install. Browse to the path where you downloaded the TAP module. Select UniView.vsaz. Click Open. Click Next.
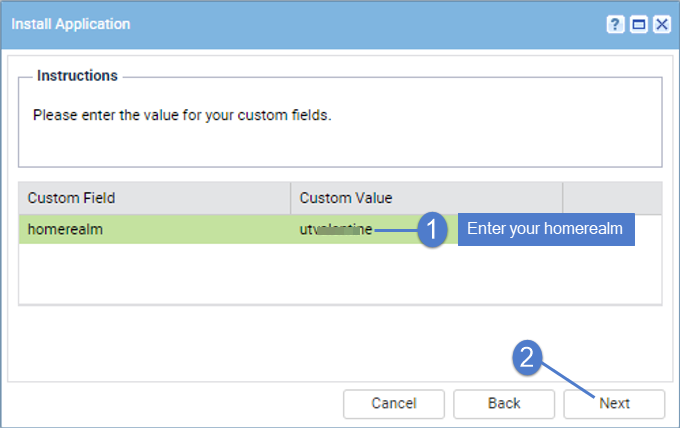
- Enter your homerealm in the homerealm Custom Value field. Click Next.
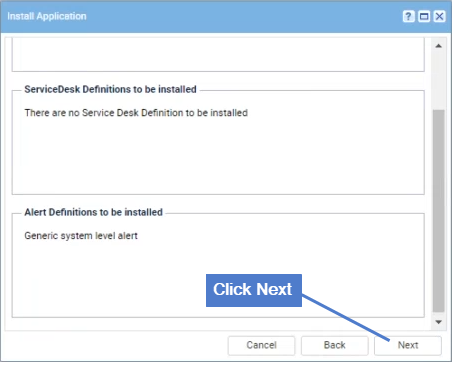
- Click Next.
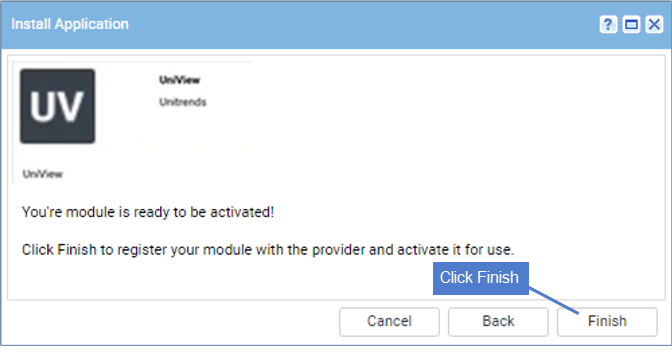
- Click Finish. The module is installed and activated.
Run this procedure to link your VSA and UniView Portal credentials, enabling single sign-on (SSO) access to the UniView module from your VSA session.
NOTES
● You must run this procedure from the VSA. Authorizing UniView Portal access to the VSA by logging in directly to backup.net is not supported.
● If you must access the VSA from the local network by IP address or DNS alias, SSO is not supported. Do not run this Step 3: Complete the integration procedure. Instead, you must enter your UniView Portal credentials to access the UniView module from your VSA session.
● This procedure uses third-party cookies for authentication and to help you sign up for our services. If prompted, click to allow third-party cookies in your browser.
● A 1-to-1 VSA to UniView Portal account ratio is now enforced. (A VSA user account can be linked to only one UniView Portal user account. A UniView Portal user can be linked to only one VSA user account.) If needed, administrators can create additional accounts to meet this requirement.
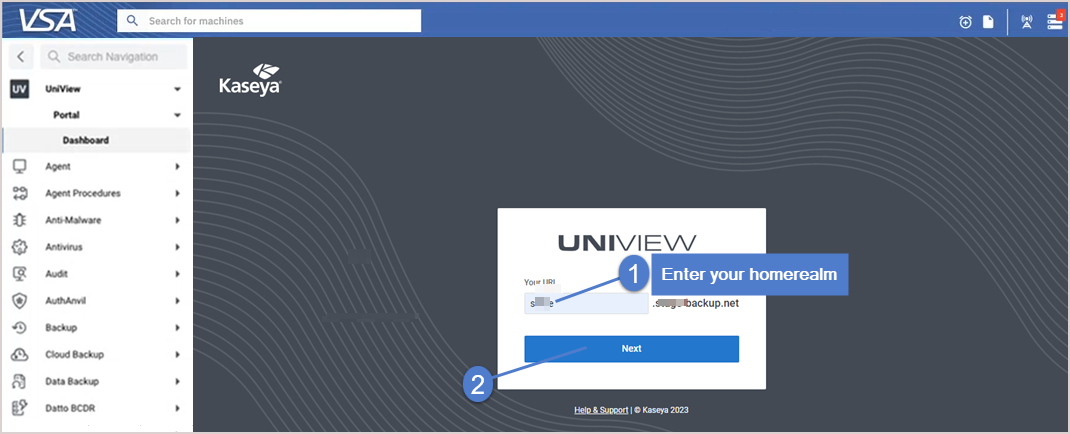
- In the VSA, select the UniView module.
- Enter the backup.net homerealm. Click Next.
- Log in to UniView Portal as a superuser.
- Enter your UniView Portal username and password.
- Click Log in.

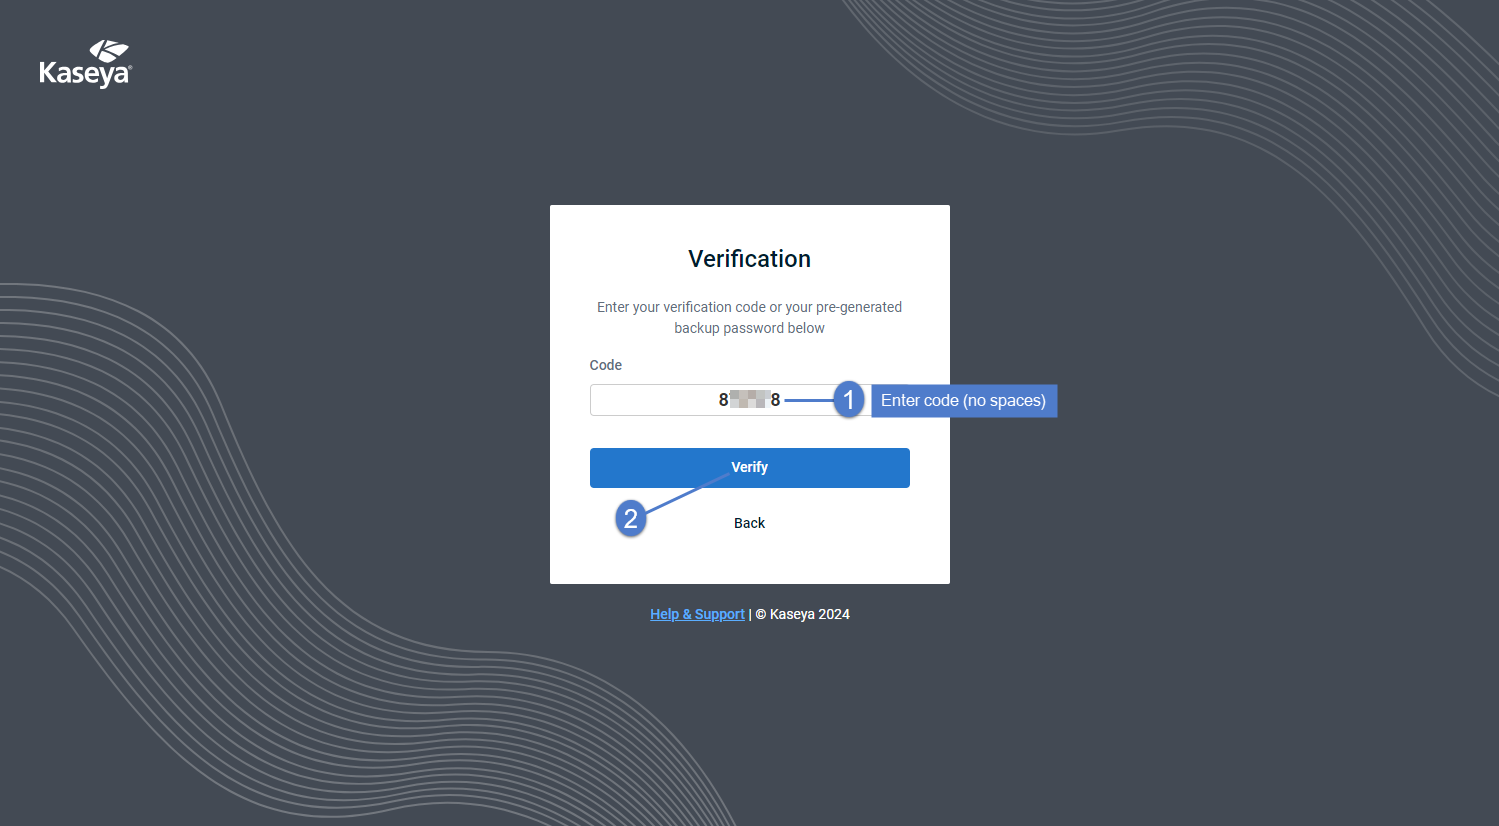
- Enter your two-factor authentication (2FA) code, then click Verify. (You can obtain the code from your authenticator app or use a recovery code.)
- Click Allow to grant UniView Portal access to the VSA instance.
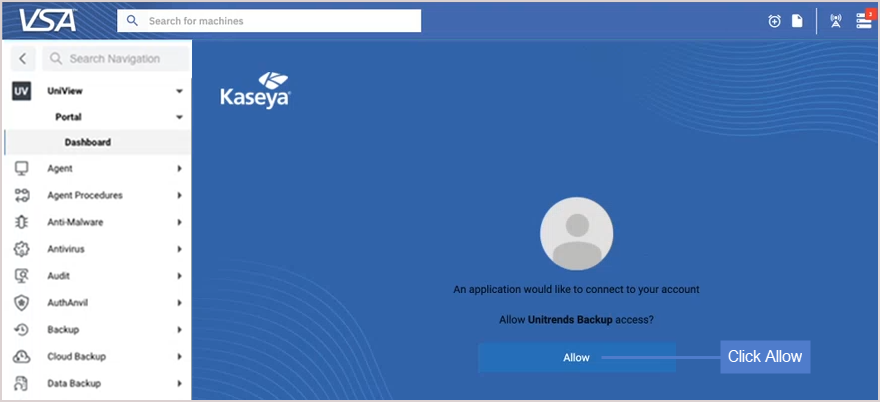
The UniView Portal Dashboard displays.


