Reporting
Security
PERMISSIONS Reporting requires the Superuser role.
Overview
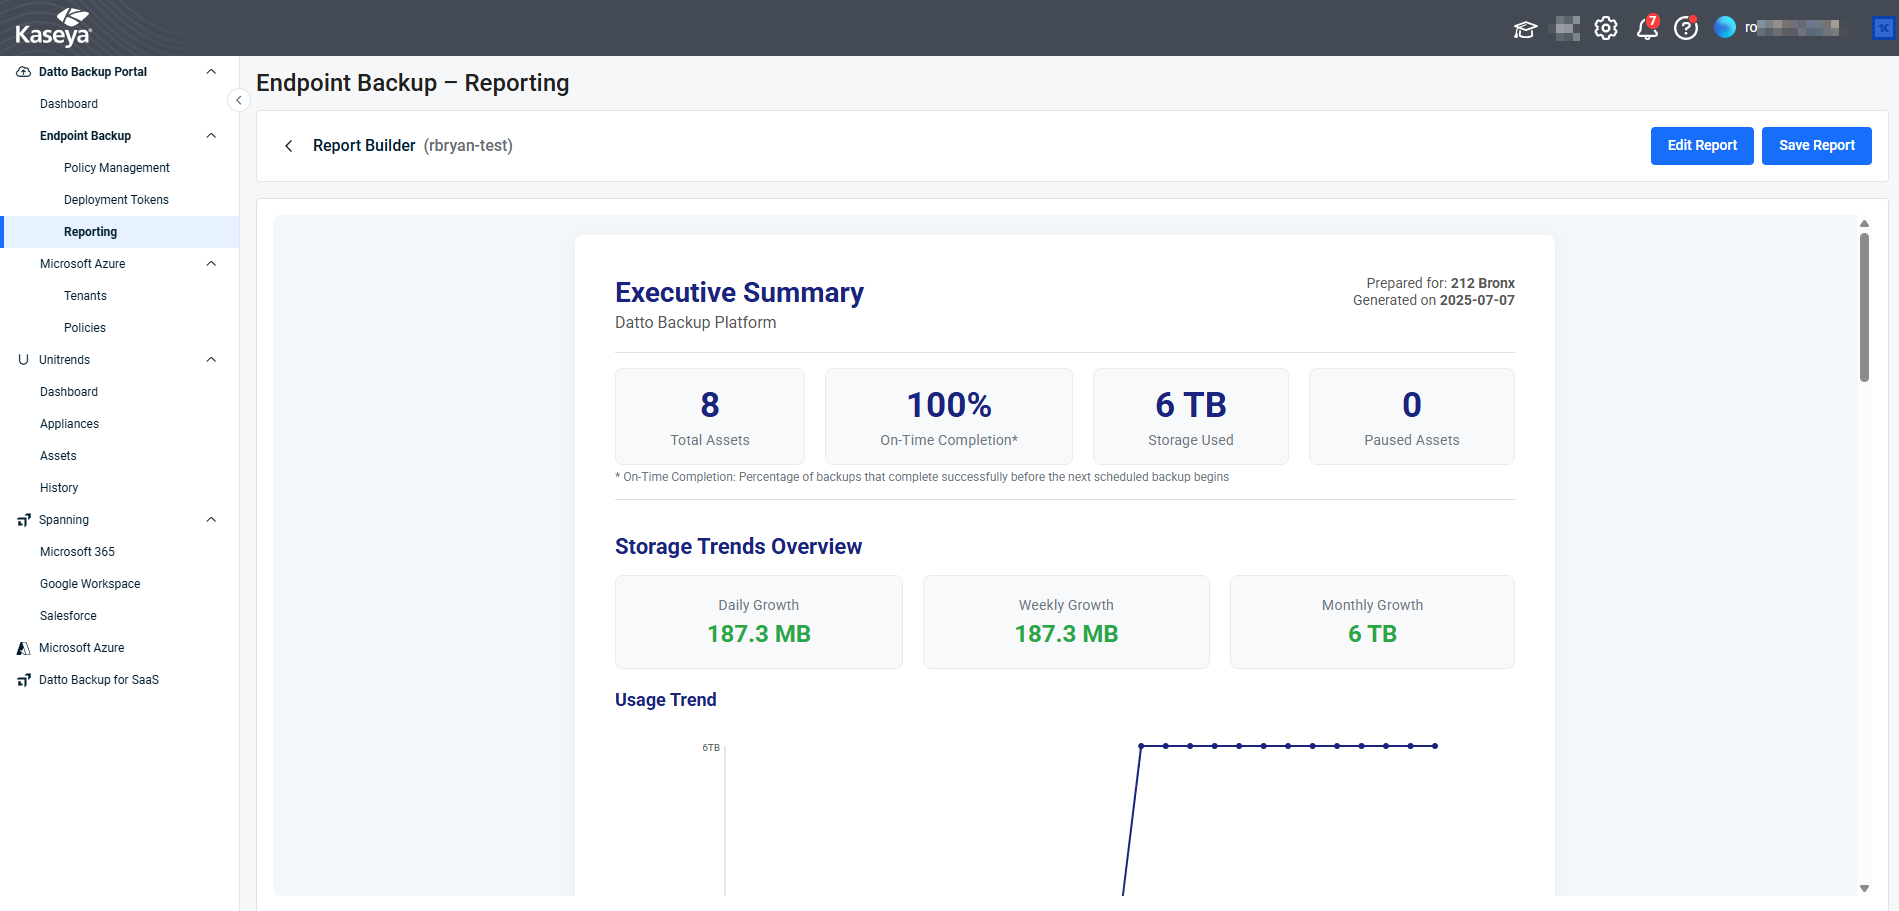
The backup report lets you create, edit, preview, and schedule QBR-style automated reports on the history of backups for an organization.
Understanding the backup report
Executive summary
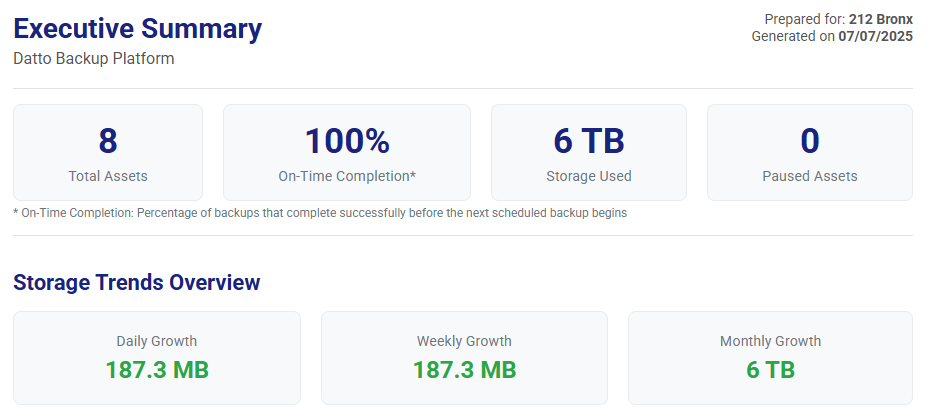
The following tiles are shown in the executive summary.
Total Assets - Count of assets for the selected organization
On-Time Completion - Percentage of backups that complete successfully before the next scheduled backup begins
Total Storage Used - Total storage usage for the selected organization
Paused Assets - Count of assets where backups are in a paused status
Storage Trends Overview
The storage trends overview section includes the following tiles.
Daily Growth - Change in storage usage over the last day
Weekly Growth - Change in storage usage over the last week
Monthly Growth - Change in storage usage over the last month
NOTE The monthly growth tile is not shown when the date range for the report is set to Last 7 days.
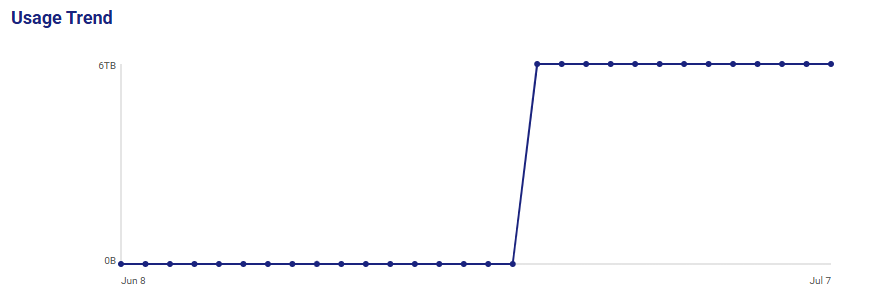
Usage Trend Graph - View of the trend of storage usage over the date range of the report
ALERT The usage trend graph only shows data for dates after reporting was enabled.
Asset Details
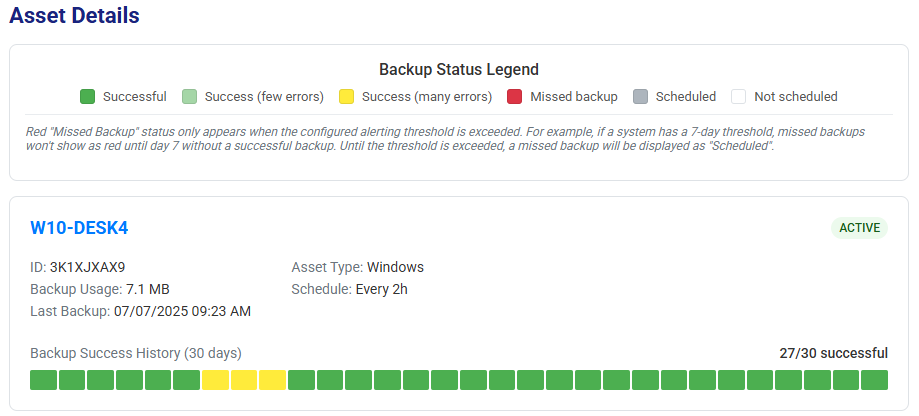
The following values are shown for each asset in the selected organization.
Asset Name - Name of the asset
ID - ID of the asset
Backup Usage - Amount of storage used to backup this asset
Last Backup - Date and time of the last backup for this asset
Asset Type - Operating system of this asset
Schedule - Backup schedule in place for this asset
Status - Current backup status of this asset
Backup Success History Graphic - View of the daily backup success for this asset.
NOTE Red "Missed Backup" status only appears when the configured alerting threshold is exceeded. For example, if a system has a 7-day threshold, missed backups won't show as red until day 7 without a successful backup. Until the threshold is exceeded, a missed backup will be displayed as "Scheduled".
To create a new report
Use the following steps to create a new backup report.
- Click Reporting under the Endpoint Backup menu.
- Click the + New Report button.
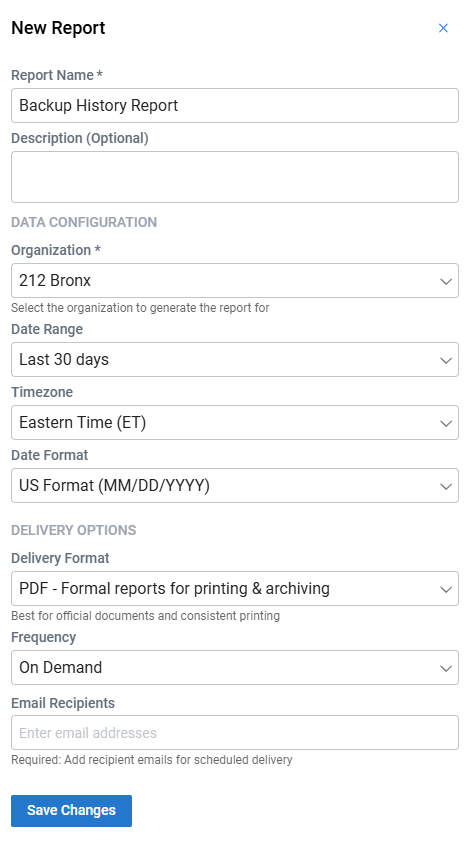
- Fill in the fields in the New Report form.
- Click Save Changes.
- Review the report preview.
- Click Save Report.
Use the following fields to define the configuration of your report.
Report Name: Required. The name of the report.
Description: Optional. Additional details about the report.
Organization: Required. Selectable from a searchable dropdown of available organizations. Only one organization can be selected.
Date Range: Required. Choose the time span for the report data.
Timezone: Required. Select the timezone for date-time values in the report.
Date Format: Required. Choose the display format for dates.
Delivery Format: Required. Select the output format (PDF or HTML).
Frequency: Required. How often the report is generated and sent.
Recipients: Required for scheduled reports.
One or more email addresses to receive the report. Not applicable when "On Demand" frequency option is selected.
To run an existing report
Use the following steps to email the results of an existing report to email recipients.
- Click Reporting under the Endpoint Backup menu.
- Click the three-dot menu for the report you want to run.
- Click Run.
- Adjust the list of recipients if needed.
- Click Confirm.
To edit an existing report
Use the following steps to make changes to a report.
- Click Reporting under the Endpoint Backup menu.
- Click the three-dot menu for the report you want to edit.
- Select Edit from the drop-down menu.
- Make your changes to the report fields.
- Click Save Changes.
- Review the report preview.
- Click Save Report.
To preview an existing report
Use the following steps to see the results of a report in the browser.
- Click Reporting under the Endpoint Backup menu.
- Click the three-dot menu for the report you want to preview.
- Select Preview from the drop-down menu.
To delete an existing report
Use the following steps to delete a report.
- Click Reporting under the Endpoint Backup menu.
- Click the three-dot menu for the report you want to delete.
- Select Delete from the drop-down menu.
- Click Delete to confirm deleting the report.
