Create a NAS CIFS or NFS backup job
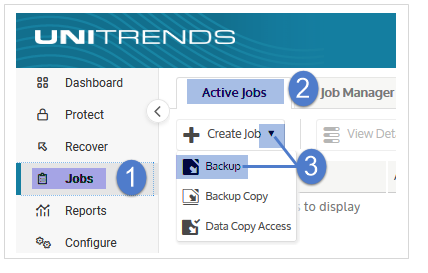
NAVIGATION Jobs > Active Jobs > Create Job > Backup
PERMISSIONS Administrator
Create a NAS CIFS or NFS backup job to protect a network-attached storage asset added to the Unitrends appliance.
You can specify directories to include or exclude from the backup using path patterns and wildcards.
BEFORE YOU BEGIN Review Backup jobs and ensure you have added your NAS asset to the Unitrends appliance.
See Managing protected assets for instructions.
Create a NAS CIFS or NFS backup job
To create a NAS CIFS or NFS backup job, complete the following steps:
-
Select Jobs > Active Jobs > Create Job > Backup.
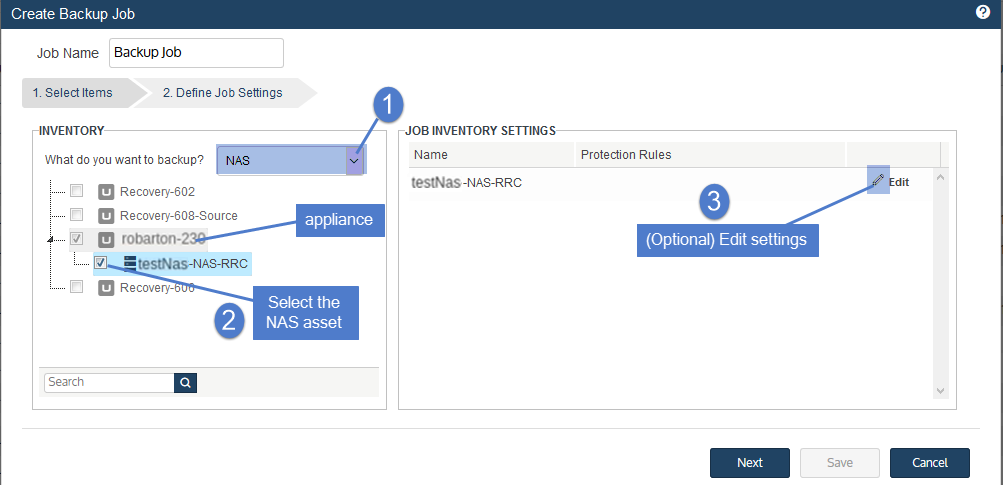
- Select NAS in the What do you want to backup? list.
- In the Inventory tree, check boxes to select the NAS assets to protect.
Selected assets display in the Job Inventory Settings area.
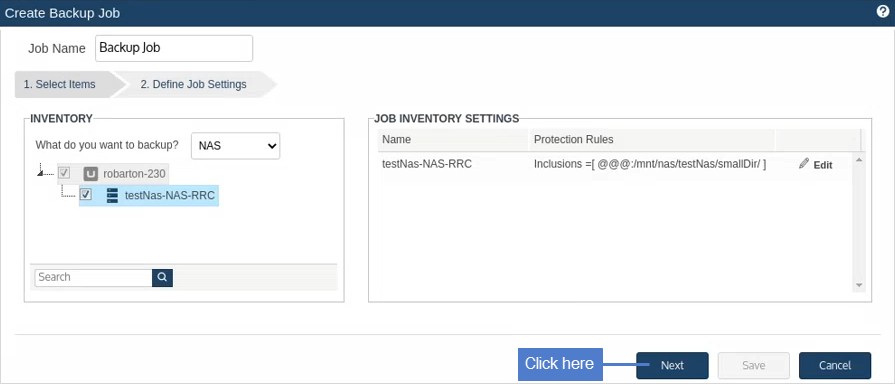
To locate an asset by name, use the Search field below. - (Optional) Edit Job Inventory Settings to specify directories to include or exclude: locate the asset in the list and click Edit, modify settings, then click Save to retain any changes.
NOTE Any inclusions or exclusions you add apply to jobs run by this schedule only.
Running an on-demand backup of the asset does not automatically apply these settings.
If you specify both inclusions and exclusions, inclusions are applied first; exclusions are then applied to the included subset. - Click Next.
-
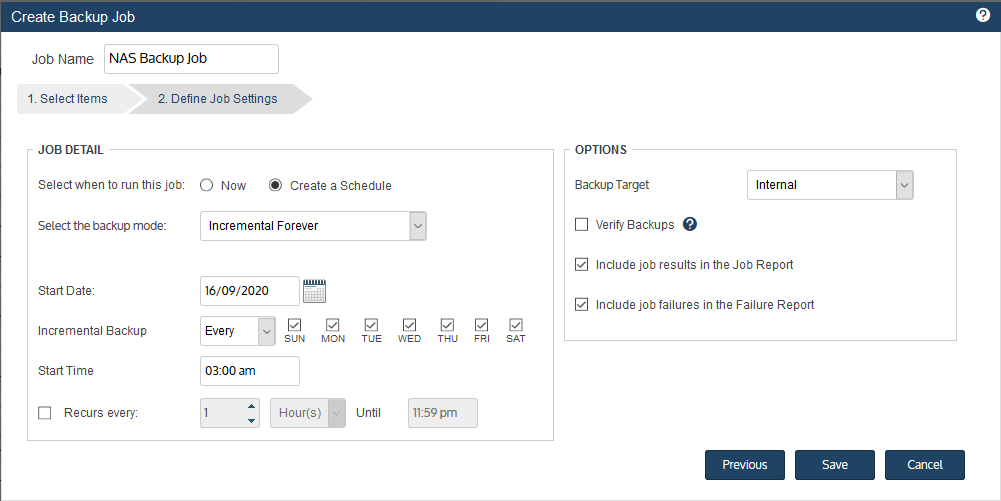
Select Now or Create a Schedule to specify when you want this job to run.
If you create a schedule, enter a unique job name. - Set remaining Job Details and Options.
In most cases, the standard backup modes can be used to create the schedule.
If you need more granularity, choose Custom to create a custom backup calendar.
See Configure a custom backup schedule for details. - Click Save.
The NAS backup job is created.
Unitrends protects the selected NAS assets according to the schedule you configured.


