Integrating ConnectWise Manage
Use these procedures to integrate ConnectWise Manage PSA with the UniView Portal. Once you have configured the integration, ConnectWise Manage creates tickets based on alerts and warnings issued by BackupIQ.
Use this procedure to create a new security role that will be used to obtain the REST API credentials needed for integration with the UniView Portal.
- Log in to ConnectWise Manage with an administrator account.
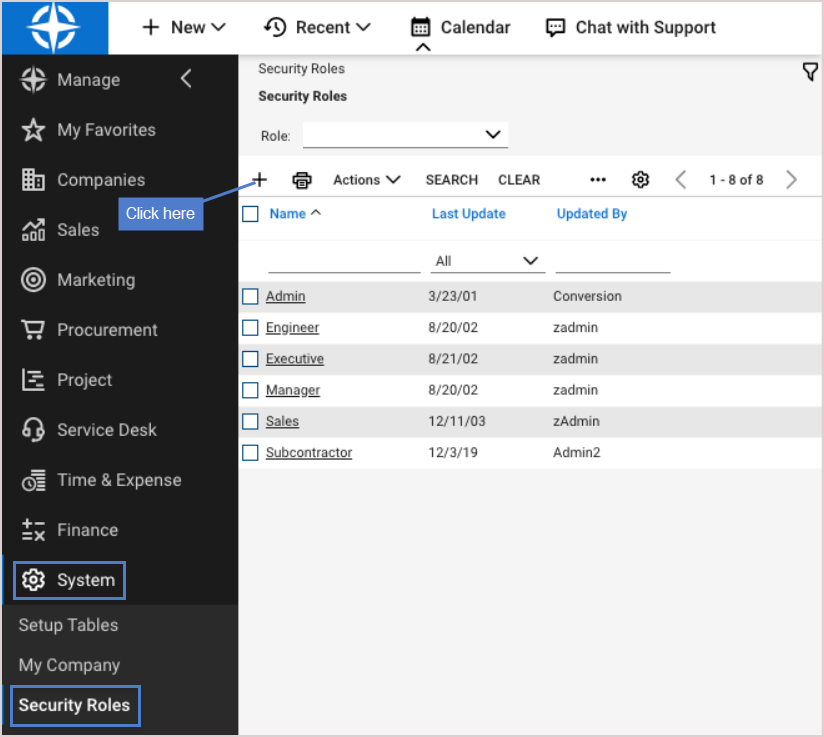
- Navigate to System > Security Roles.
- Click the plus icon (+) at the top of the screen.
-
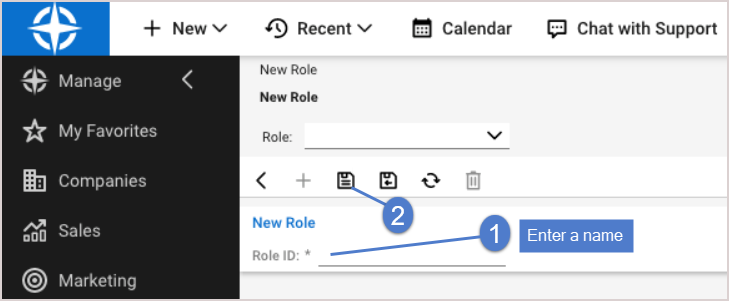
In the Role ID field, enter a name for your new security role (e.g., UniView Portal API Integration). Click the Save icon.
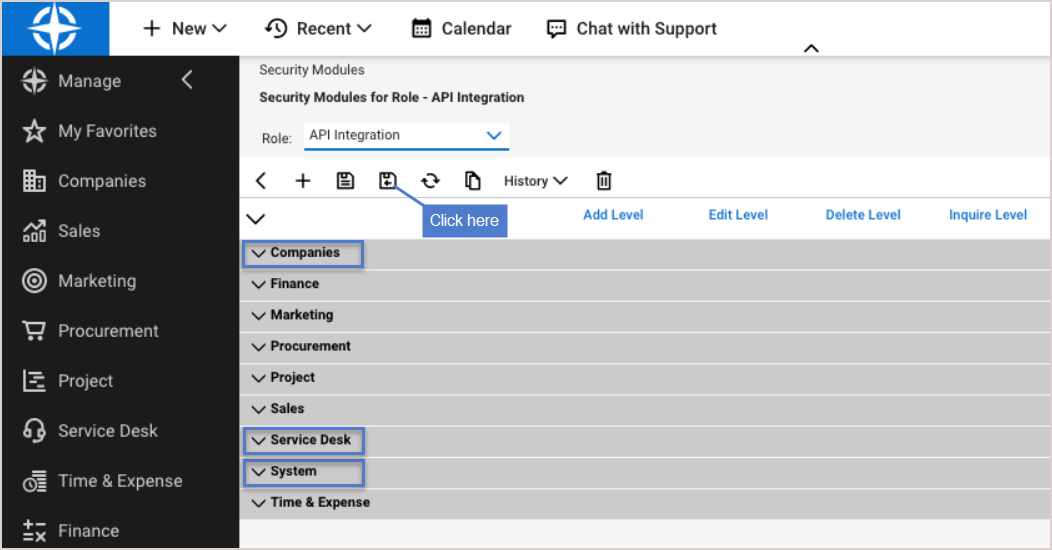
- On the Security Modules screen, click the down arrows beside the Companies, Service Desk, and System headings to expand each section.
- In all three sections, replicate the permission parameters exactly as shown in the tables below. To do so, click the down arrows to change the permissions from None (default) to All. The tables below only show the rows that require editing.
|
Companies |
Add Level |
Edit Level |
Delete Level |
Inquire Level |
|---|---|---|---|---|
|
Company Maintenance |
None |
None |
None |
All |
|
Company / Contact Group Maintenance |
None |
None |
None |
All |
|
Service Desk |
Add Level |
Edit Level |
Delete Level |
Inquire Level |
|---|---|---|---|---|
|
Close Service Tickets |
All |
All |
None |
All |
|
Merge Tickets |
All |
All |
None |
All |
|
Service Tickets - Dependencies |
All |
All |
None |
All |
|
Service Tickets |
All |
All |
None |
All |
|
Service Tickets - Finance |
All |
All |
None |
All |
|
System |
Add Level |
Edit Level |
Delete Level |
Inquire Level |
|---|---|---|---|---|
|
Table Setup |
None |
None |
None |
All |
- Click the Save and Close icon.
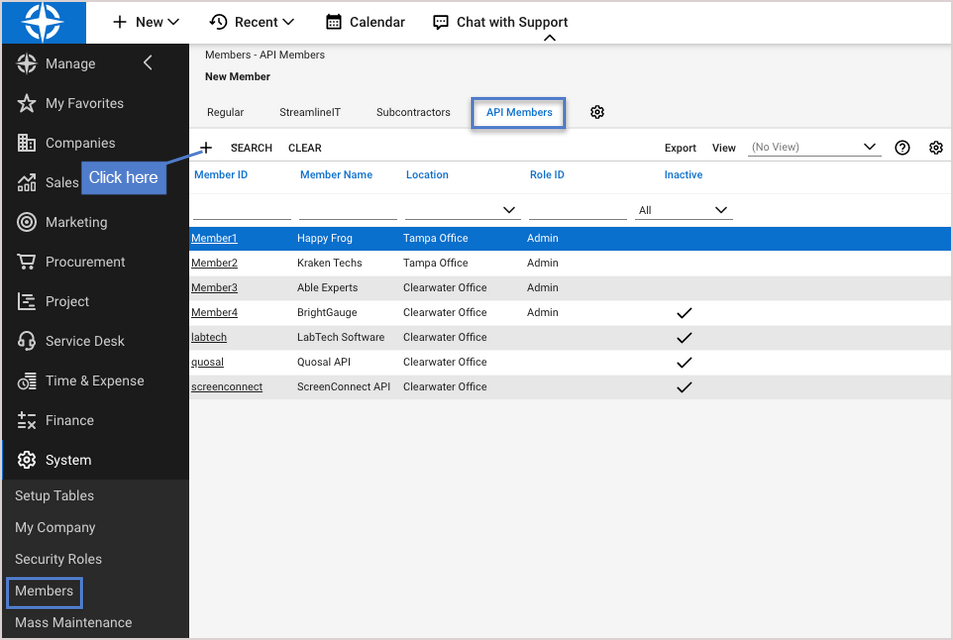
- Navigate to the System > Members > API Members tab. Click the plus icon (+).
- On the next Detail screen, complete the following fields in each section:
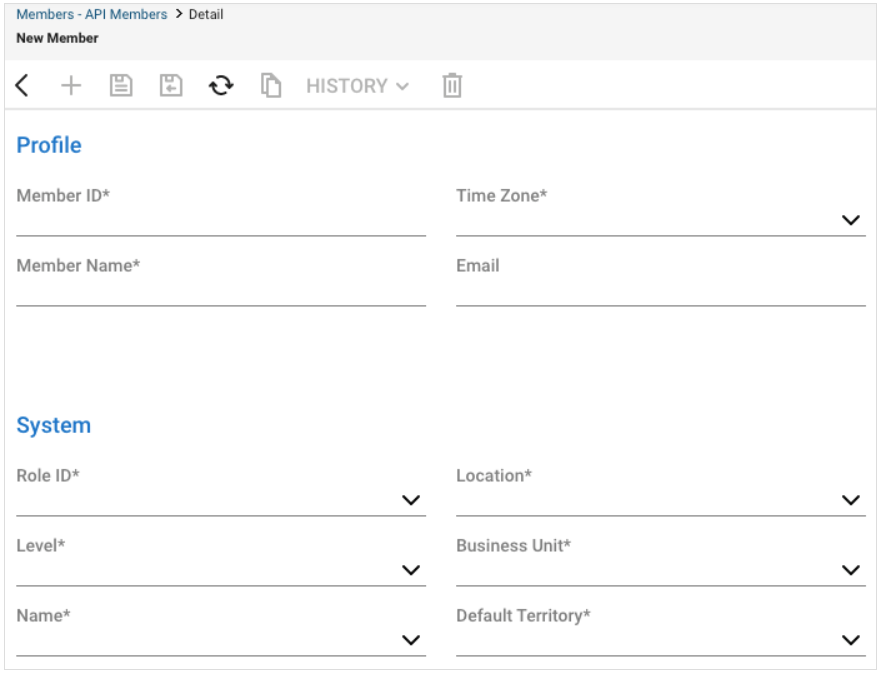
- Profile section –
- Member ID – Enter the username of the member (e.g., Uni Portal). The maximum number of characters allowed is 15.
- Time Zone – Select a time zone for the internal company.
- Member Name – Enter the member's first and last name.
- System section –
- Role ID – The security Role ID controls the level of access to the ConnectWise Manage application by limiting access to functionality. Select the new security role that you created in step 4 (e.g., UniView Portal API Integration).
- Location – Select the default location for the company. Any new record created by the member will default to the location set here.
- Level – Select the level of access that the member will have in the application. The member will be able to search for companies at the specified level and the ones below it. The restriction here applies to tickets for companies outside the location, as well as members.
IMPORTANT We strongly recommend that you select the highest level of access (e.g., Level 1) to ensure that all companies will sync to the UniView Portal without issue. Selecting a lower level of access may result in some companies not syncing to the UniView Portal.
- Business Unit – Select the member's business unit.
- Name – This field corresponds to the Level field above. After selecting a Level, select a specific name associated with the structure level.
- Default Territory – Select the member's default territory.
- In the top menu bar, click the Save icon.
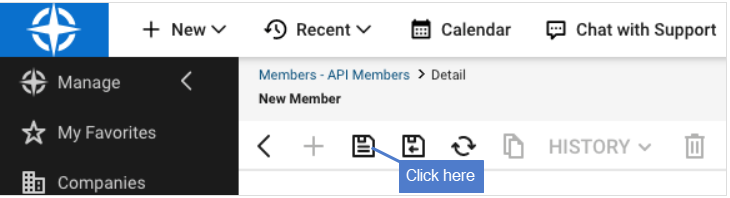
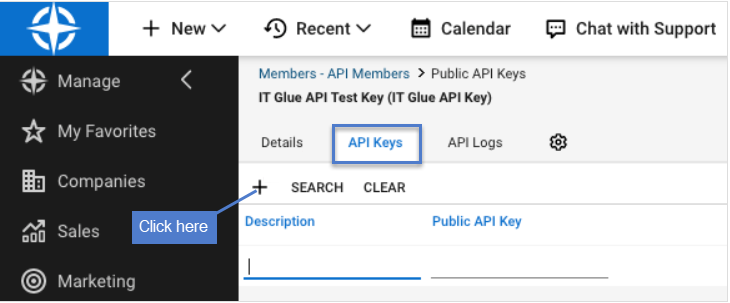
- Click the API Keys tab and then on the plus icon (+).
- Enter a description of the key (e.g., UniView Portal) and click the Save icon.
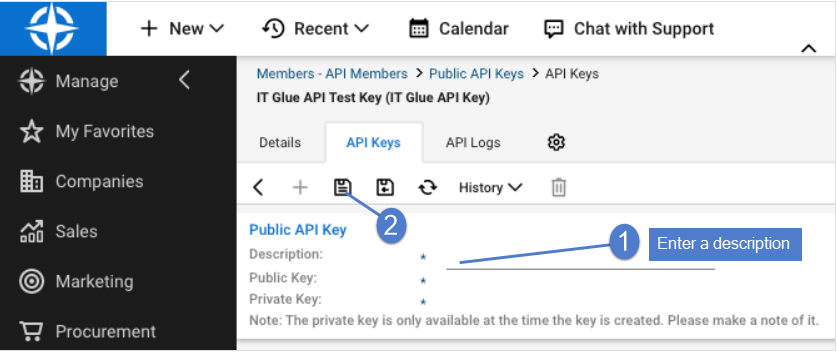
- The public and private keys are generated. Note the Public and Private Keys. You will enter these in the
Step 2: Add the ConnectWise Manage integration procedure.
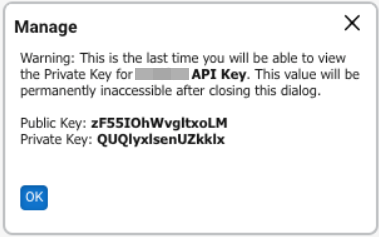
IMPORTANT Keep the private key in a secure location. The key will not be visible again after closing the window.
NOTE During this procedure you will select a company, service board, and priority level for alerts. These selections are applied to all ConnectWise organizations by default. If needed, you can modify these settings as described in To view or modify one organization's ConnectWise Manage settings.
- Log in to the UniView Portal with a superuser account.
- Click
 :
:
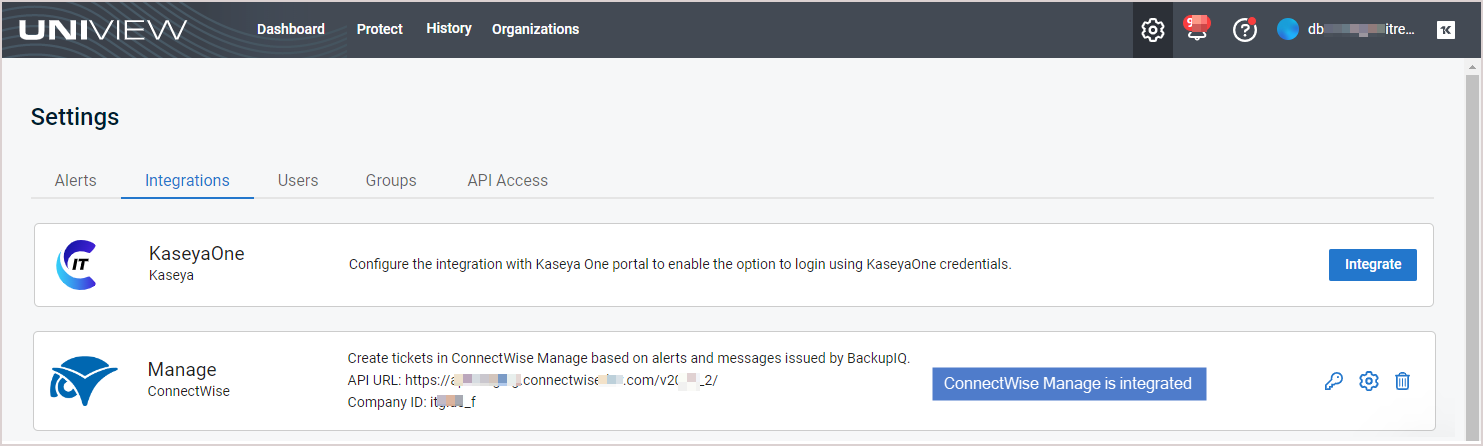
- Select the Integrations view.
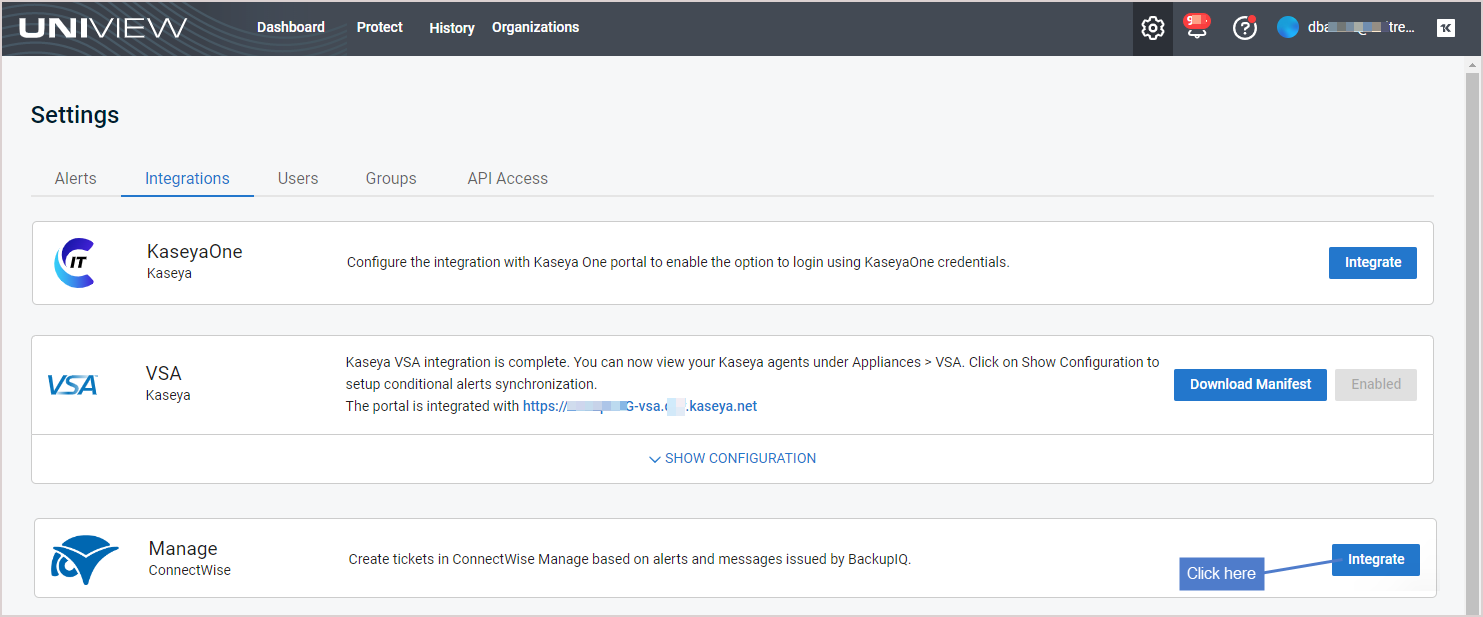
- Locate the ConnectWise Manage integration and click Integrate:
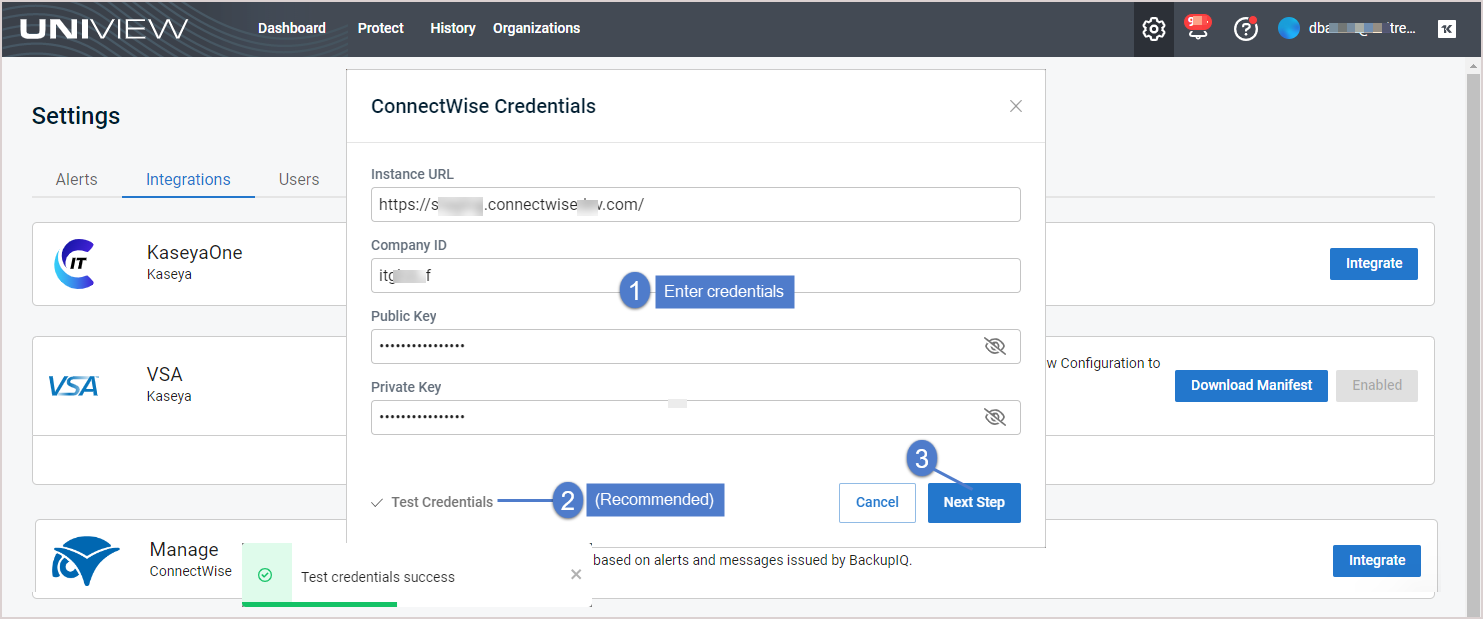
- Enter the ConnectWise Instance URL and Company ID. Enter the Public Key and Private Key that you generated in the Step 1: Add a security role to ConnectWise procedure above.
- (Recommended) Click Test Credentials to verify that UniView Portal can connect to ConnectWise Manage.
- Click Next Step.
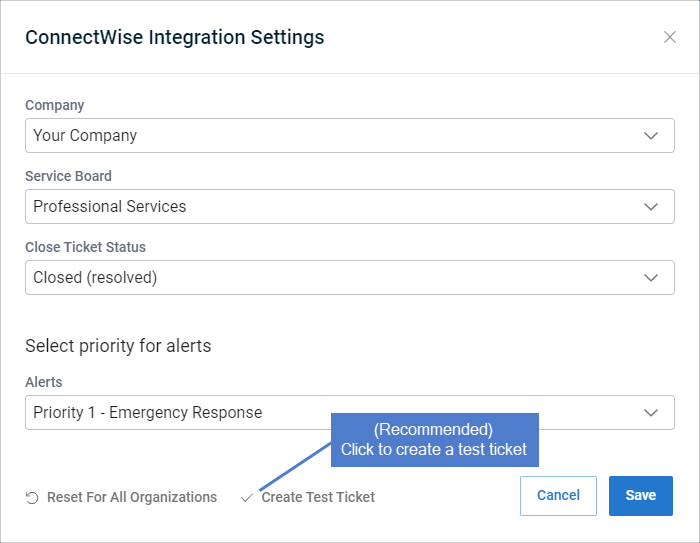
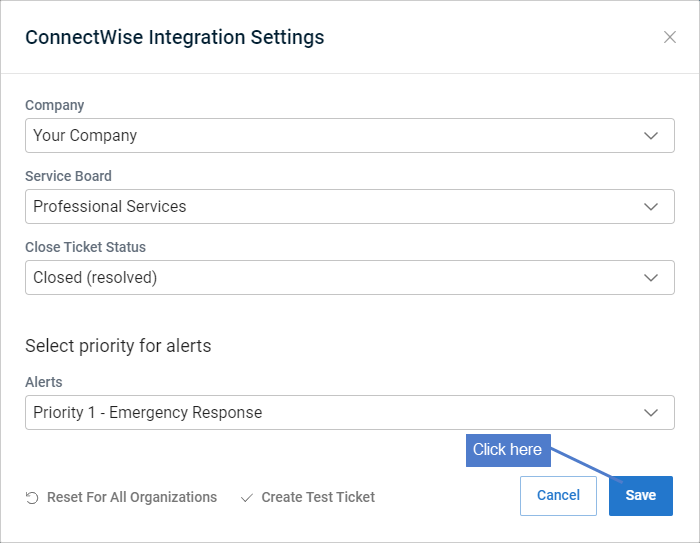
- Select a Company and Service Board.
- The service board you select is the location where BackupIQ tickets will be created in ConnectWise Manage.
- The drop-down lists contain all companies and service boards assigned to the UniView Portal account. (If needed, you can use ConnectWise Manage to add a new company and service board to use for BackupIQ tickets.)
- You can switch to another service board or company at any time by editing these settings (see To view or modify ConnectWise Manage integration settings.)
- (Optional) BackupIQ dismisses offline appliance alerts and conditional alarms automatically when the alert condition has been resolved. You can opt to automatically close corresponding ConnectWise tickets by selecting a status from the Close Ticket Status list. Or select Do not close automatically.
- Select a priority level for alerts from the Alerts list. Choose from these levels:
- Do not sync – No ticket is created in ConnectWise Manage
- Priority 1 – Emergency Response
- Priority 2 – Quick Response
- Priority 3 – Normal Response
- Priority 4 – Scheduled Maintenance

- (Recommended) Click Create Test Ticket. Go to ConnectWise Manage to view the test ticket.
EXAMPLE Sample test ticket in ConnectWise Manage: 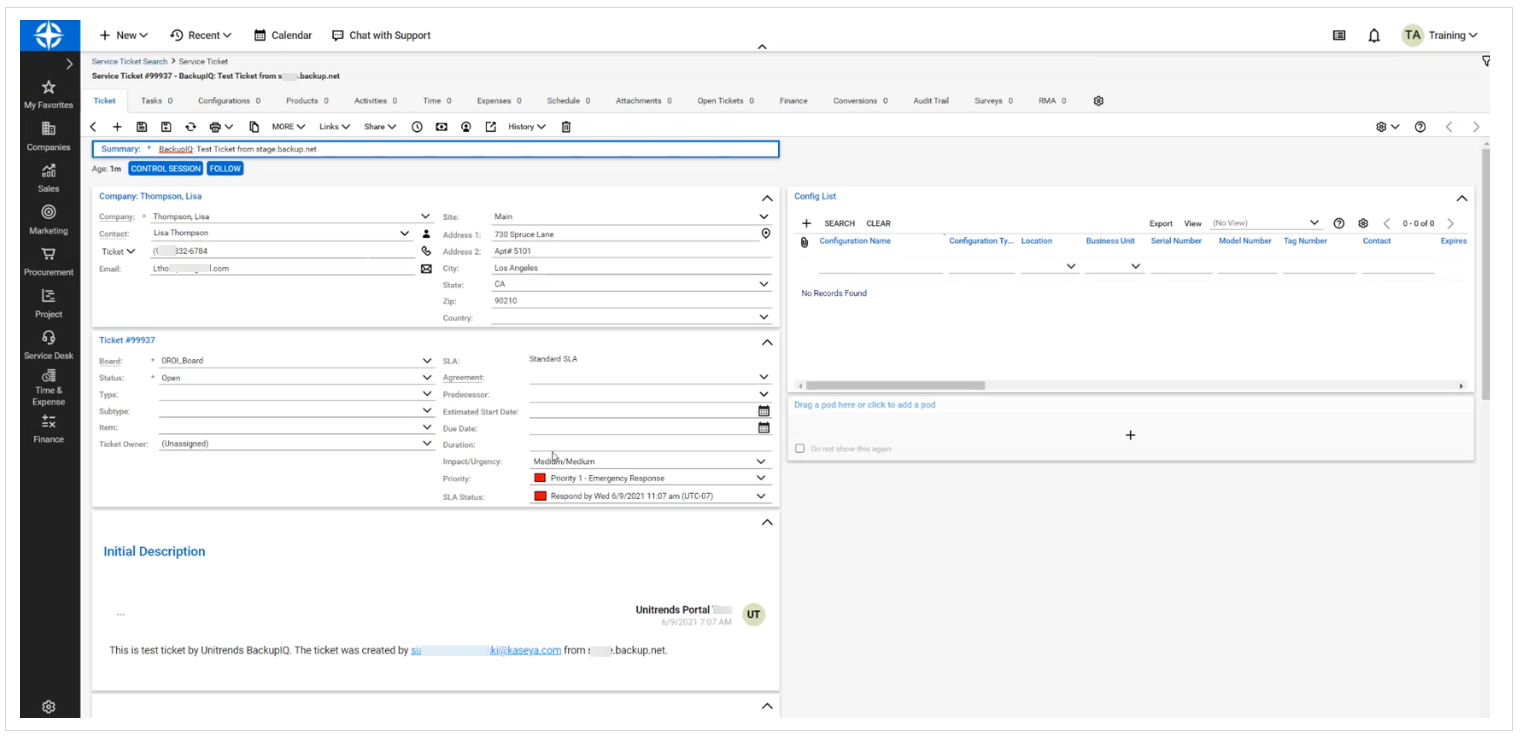
- Click Save.
- Map organizations to ConnectWise companies.
By default, all organizations are mapped to the company you selected above in step 8. If needed, assign organizations to other ConnectWise companies as shown here. Once you've completed your company selections, click Map:
NOTE If there are no ConnectWise companies in the Organization Mapping dialog, or if you do not see all companies in the drop-down lists:
1. Click Map to add the integration and exit the dialog.
2. Import organizations from ConnectWise as described in
Importing organizations from Autotask, ConnectWise Manage, BMS, or Vorex.
- The integration is added.
NOTE ConnectWise tickets are created for all BackupIQ alerts unless you selected Do not sync in the ConnectWise Integration Settings > Alerts field.


