Integrating Autotask
Use the procedures below to integrate Autotask PSA with the UniView Portal. Once you have configured the integration, Autotask creates tickets based on alerts and warnings issued by BackupIQ.
Use this procedure to create an API user that Autotask will use for the UniView Portal integration.
- Log in to Autotask.
- Select
 >
> > Admin.
- Expand Resources/Users (HR) and click Resources/Users.

- Click New.
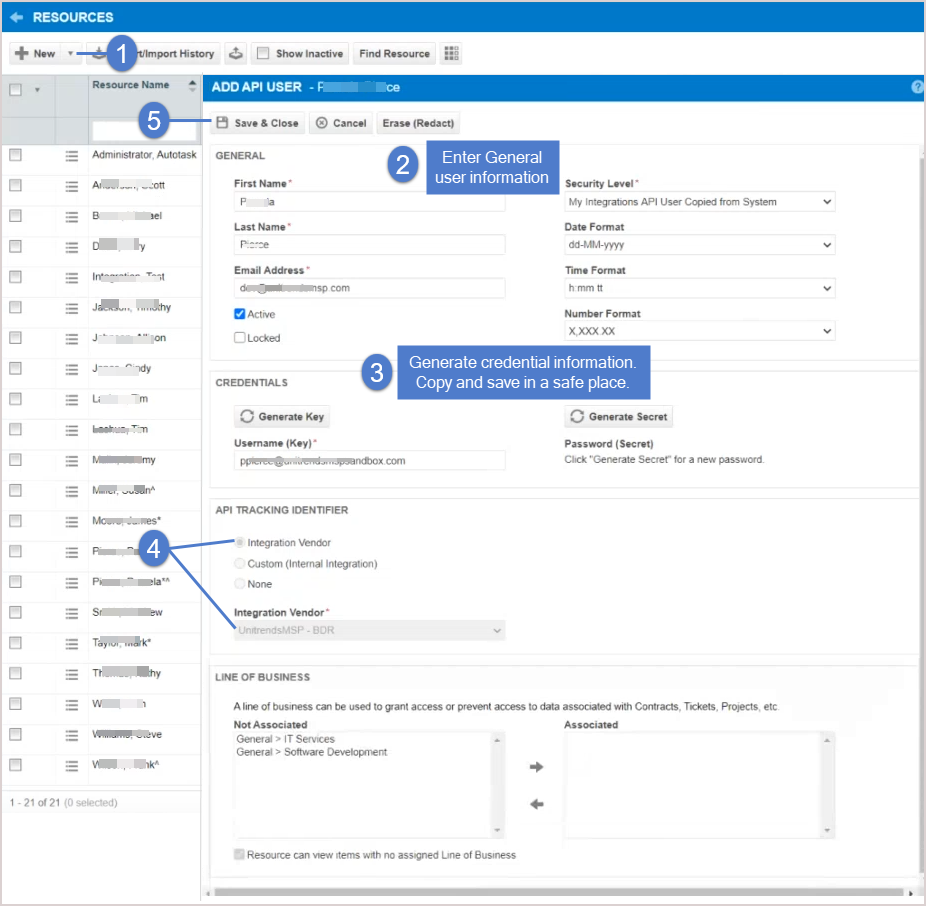
- Enter user information.
- Be sure to select the following in the API Tracker Identifier area: the Integration Vendor option and UnitrendsMSP-BDR from the Integration Vendor list.
- Save the username and password of the API user in a safe place. You will need these credentials to complete the integration.
- Click Save & Close.
Use this procedure to add the integration to the UniView Portal.
- Log in to the UniView Portal with a superuser account.
- Click
 :
:
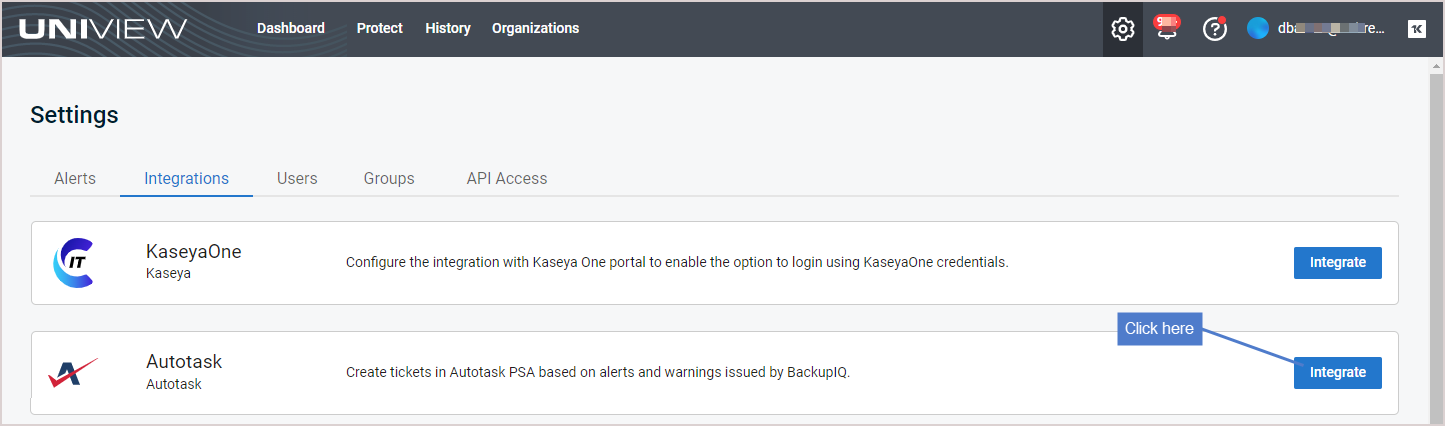
- Select the Integrations view.
- Locate the Autotask integration and click Integrate:
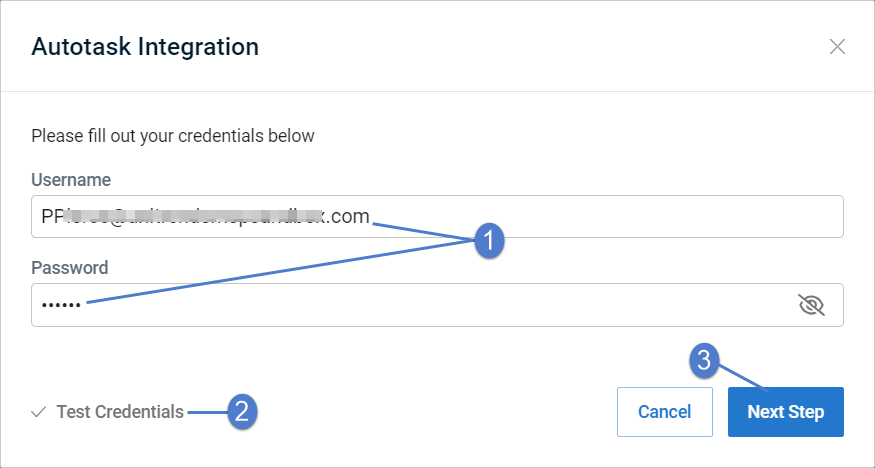
- Enter the Username and Password of the API user.
- (Recommended) Click Test Credentials to verify that UniView Portal can connect to Autotask.
- Click Next Step.
-
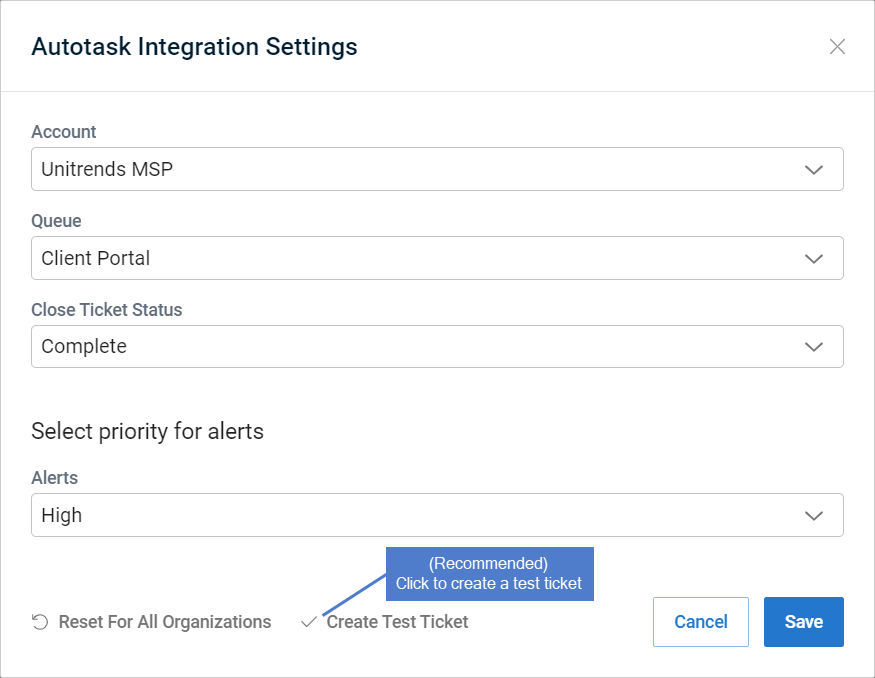
Select an Autotask account from the Account list.
By default, the account you select here is applied to all Autotask organizations. The list contains all Autotask accounts that have been mapped to a UniView Portal organization. If you don't see your account in the list, use the Mapping companies and accounts to organizations procedure to add the account to the list. Later in this procedure you can map different accounts to other organizations as needed.
- Select an Autotask ticketing queue from the Queue list.
- The queue you select is the location where BackupIQ tickets will be created in Autotask.
- Only one Autotask ticketing queue can be used for BackupIQ tickets.
- This list contains all Autotask queues assigned to the Unitrends MSP account. (If needed, you can use Autotask to create a new queue to use for BackupIQ tickets.)
- You can switch to another queue at any time by editing this setting (see To view or modify Autotask integration settings.)
- (Optional) BackupIQ dismisses offline appliance alerts and conditional alarms automatically when the alert condition has been resolved. You can opt to automatically close corresponding Autotask tickets by selecting a status from the Close Ticket Status list. Or select Do not close automatically.
- Select a priority level for alerts. Choose from these levels: Do not sync, High, Medium, Low, or Critical.
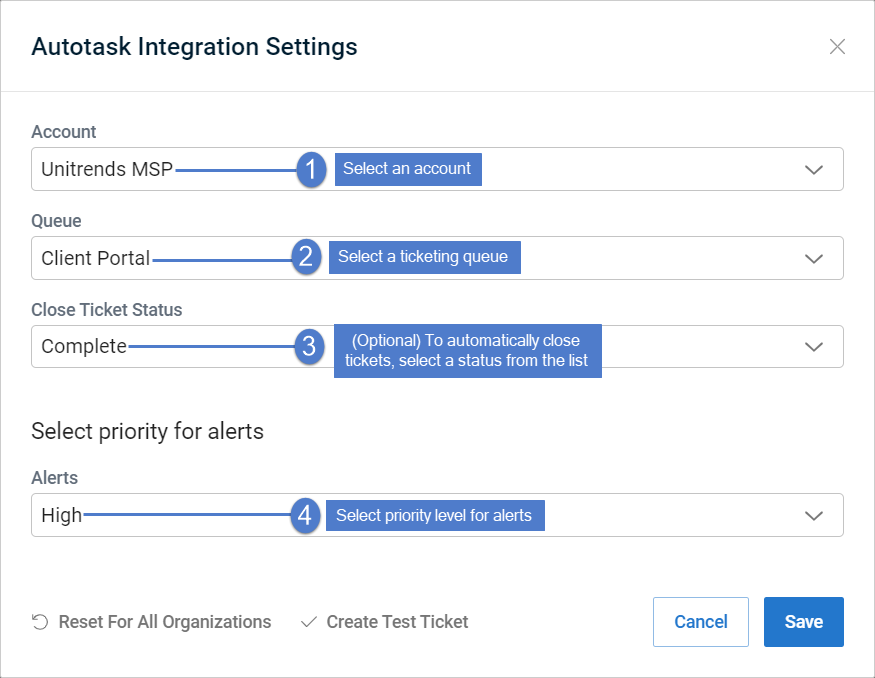
- (Recommended) Click Create Test Ticket. Go to Autotask to view the test ticket.
Sample test ticket in Autotask: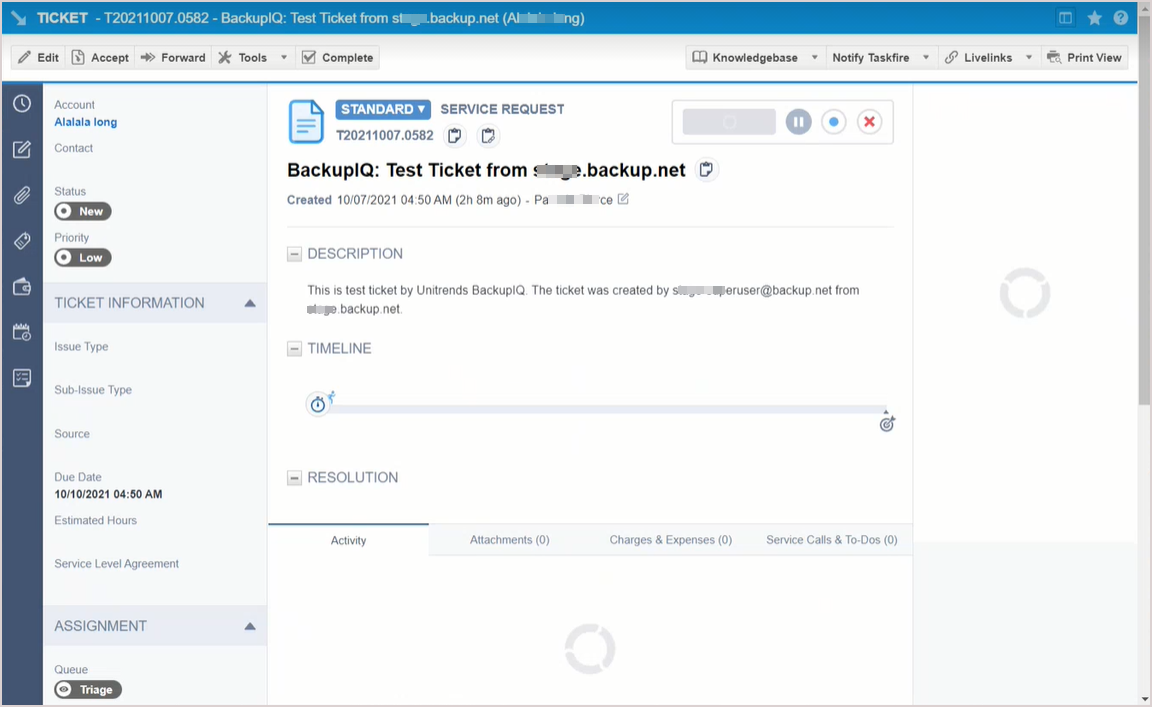
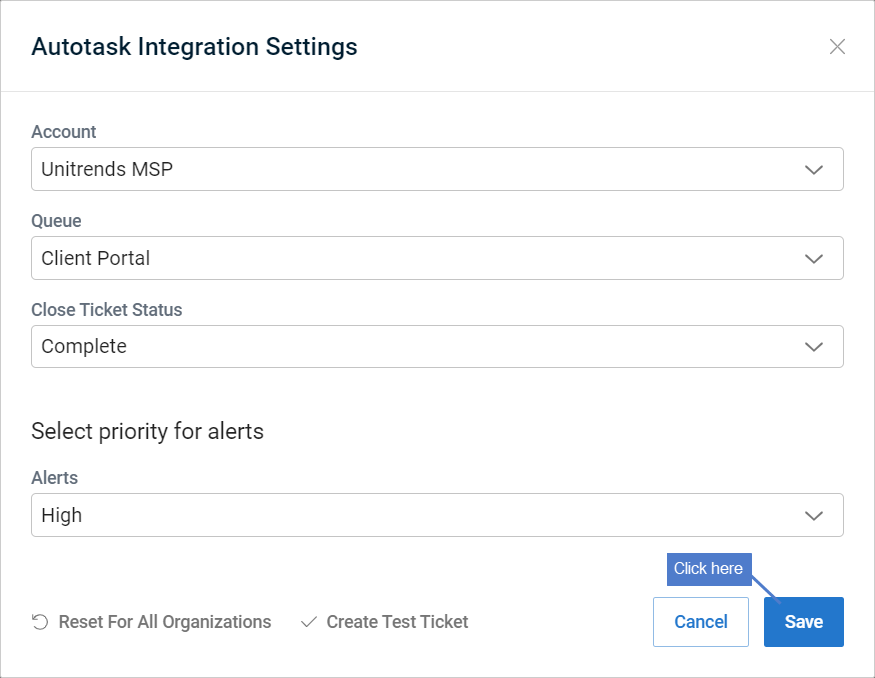
- Click Save.
- Map organizations to Autotask accounts.
By default, all organizations are mapped to the account you selected above in step 8. If needed, assign organizations to other Autotask accounts as shown here. Once you've completed your account selections, click Map.
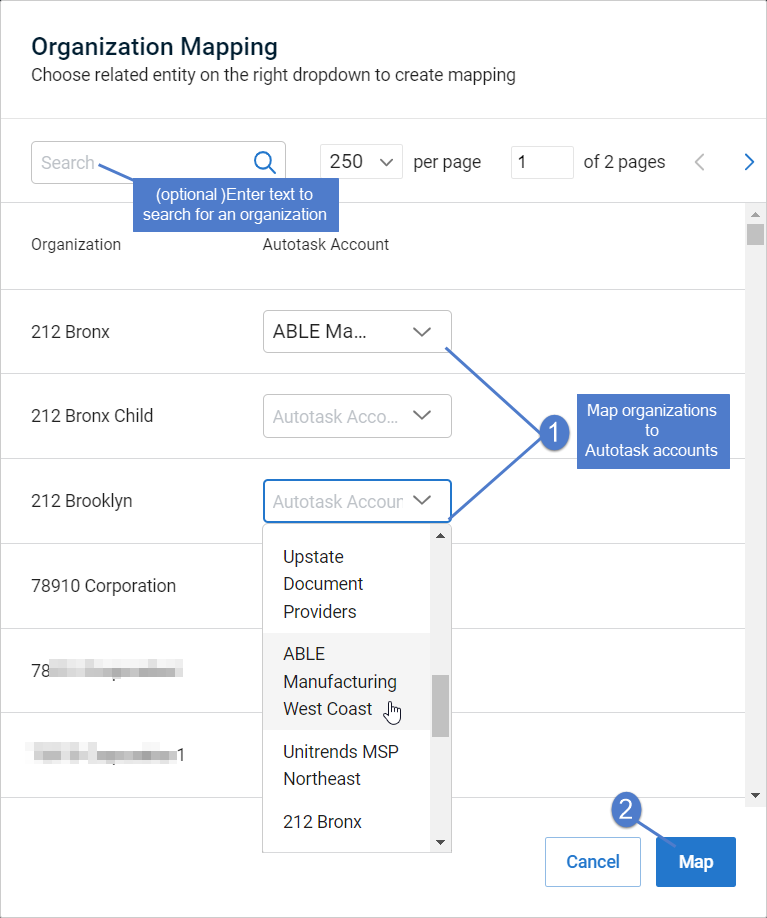
NOTE If there are no Autotask accounts in the Organization Mapping dialog, or if you do not see all accounts in the drop-down lists:
1. Click Map to add the integration and exit the dialog.
2. Import organizations from Autotask as described in
Importing organizations from Autotask, ConnectWise Manage, BMS, or Vorex.
The integration is added.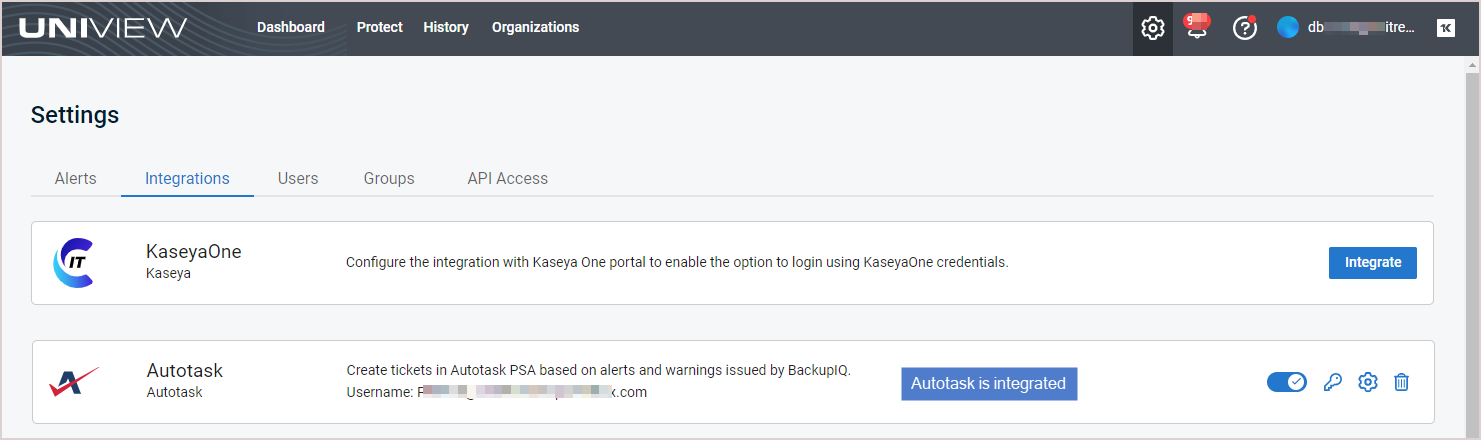
After you have completed the step above, tickets are added to the Autotask queue as new BackupIQ alerts. To view these tickets, see To view BackupIQ tickets in Autotask.
NOTE Autotask tickets are created for all BackupIQ alerts unless you selected Do not sync in the Autotask Integration Settings Alerts field.


