Using Groups and Users
Use these procedures to view and add portal users, and to add and apply groups that define which organizations a user can access in the UniView Portal.
Users and groups (formerly known as scopes) are managed from the Settings page. To access the Settings page, click ![]() :
:
Use these procedures to manage portal users:
Access to data and features is determined by the role and group(s) of the UniView Portal account that the MSP, SMB, or organization uses to log in to the portal. A user's role defines the functions they can perform. The assigned groups determine the data they can see. Membership in a role and membership in a group are independent of each other.
- The group defines which organizations are visible to the user in the UniView Portal. For details, see Working with groups.
- The role defines which features and procedures the user can run:
|
Role |
Description |
|---|---|
|
Superuser |
This role can perform all operations for all organizations, including creating and modifying other Superuser accounts, and adding or modifying integrations. Superusers are assigned all groups and have access to all organizations. |
|
Admin |
This role can perform most operations, including appliance configuration, backup job configuration and management, and user creation. Admin users cannot create or modify Superuser accounts, cannot create groups, and cannot add or modify integrations. Admins can only view and perform operations for certain organizations, based on the groups assigned to their user account. |
|
Manage |
This role has Monitor access and can start backup jobs and modify retention settings. |
|
Monitor |
This role has read-only access to the user interface and reports. |
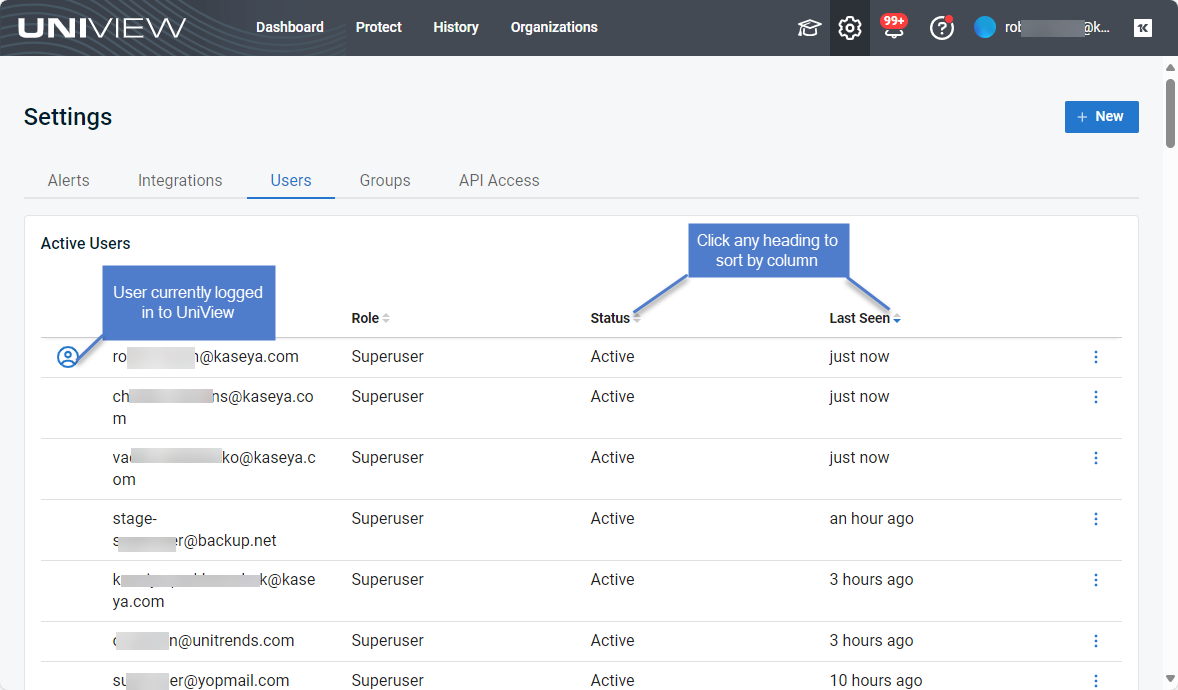
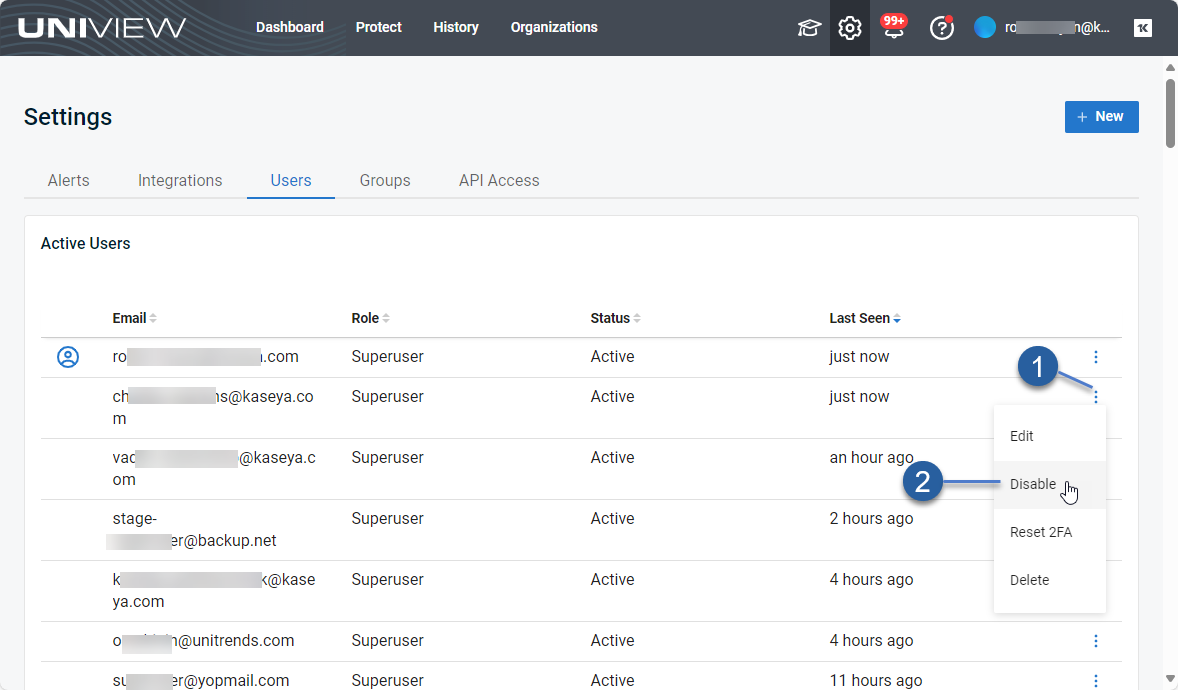
The Users view displays all portal users in the groups that are visible in the current UniView Portal session. To change the sort order of the display, click any column heading.
The following information is given for each user:
- Email – Email address used to create the user.
- Role – Role that determines which features and procedures the user can run: Monitor, Manage, Admin, or Superuser. (See About UniView Portal user accounts for details.)
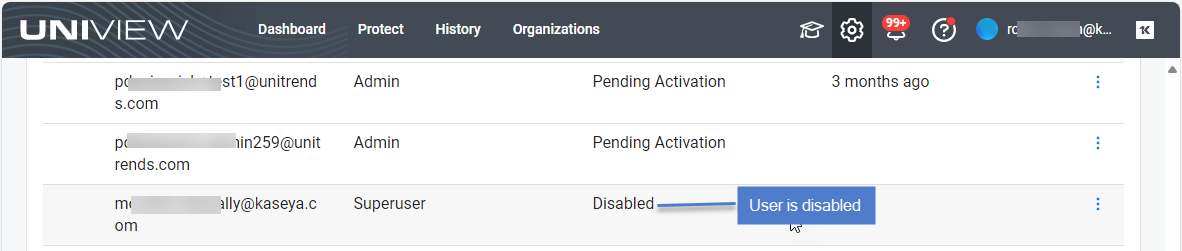
- Status – User status: active, pending activation, or disabled.
- Last seen – Number of days since last login.
 icon –
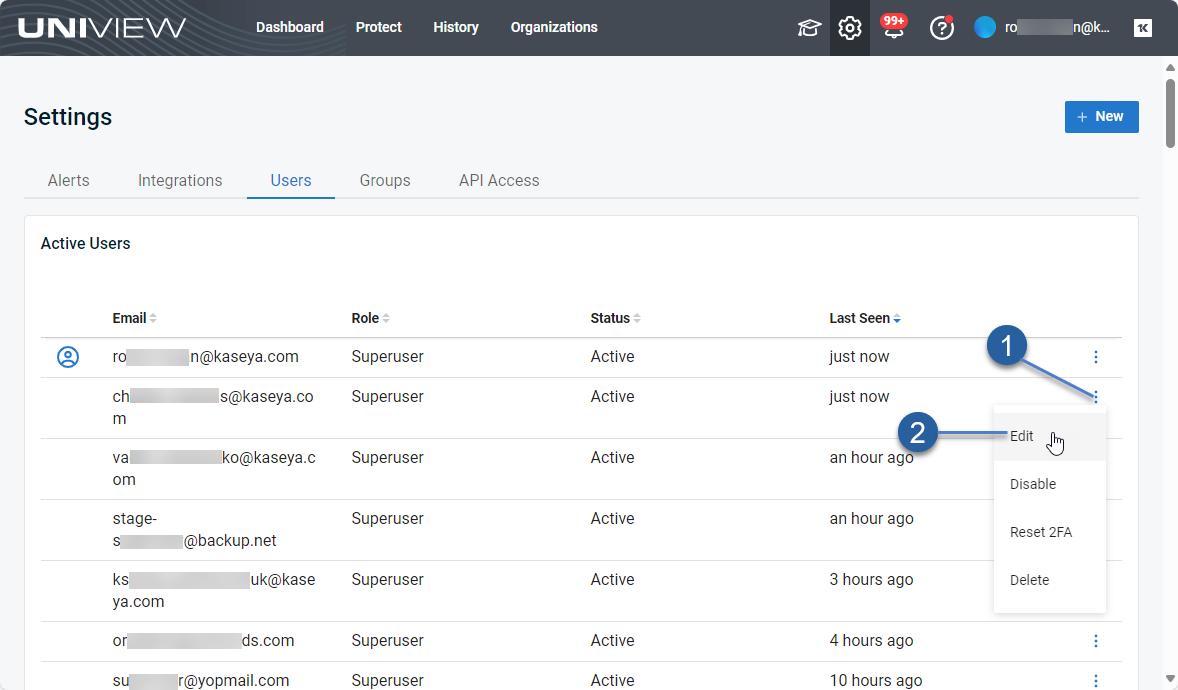
 - For active users, click to edit or disable the user account, or to reset the user's two-factor authentication (2FA).
- For disabled users, click to enable the user account.
- For users in pending activation status, click to resend the Welcome to UniView email with an updated Activate Now link. (New users must click Activate Now to set their password and log in to UniView within 48 hours of receiving the Welcome to UniView email. Resending the email provides a new link with a fresh 48-hour activation window.)
Users can be added to the UniView Portal manually by using the procedure below or automatically by integrating KaseyaOne and enabling the automatic user creation feature. (To start using this feature, see To enable or disable automatic user creation.)
NOTE If two-factor authorization (2FA) has been enabled for your UniView Portal instance, new users are automatically prompted to configure the 2FA application when they log in for the first time.
- Log in to the UniView Portal with an account that has the Admin or Superuser role.
NOTES
● As Admin, you can add a user account and assign it any role other than Superuser.
● As Superuser, you can add a user and assign it any role, including that of Superuser.
- Click
 :
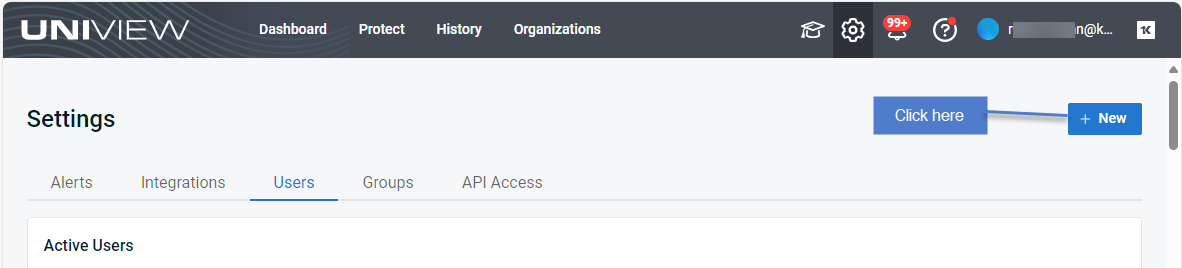
: - In the Users view, click + New.
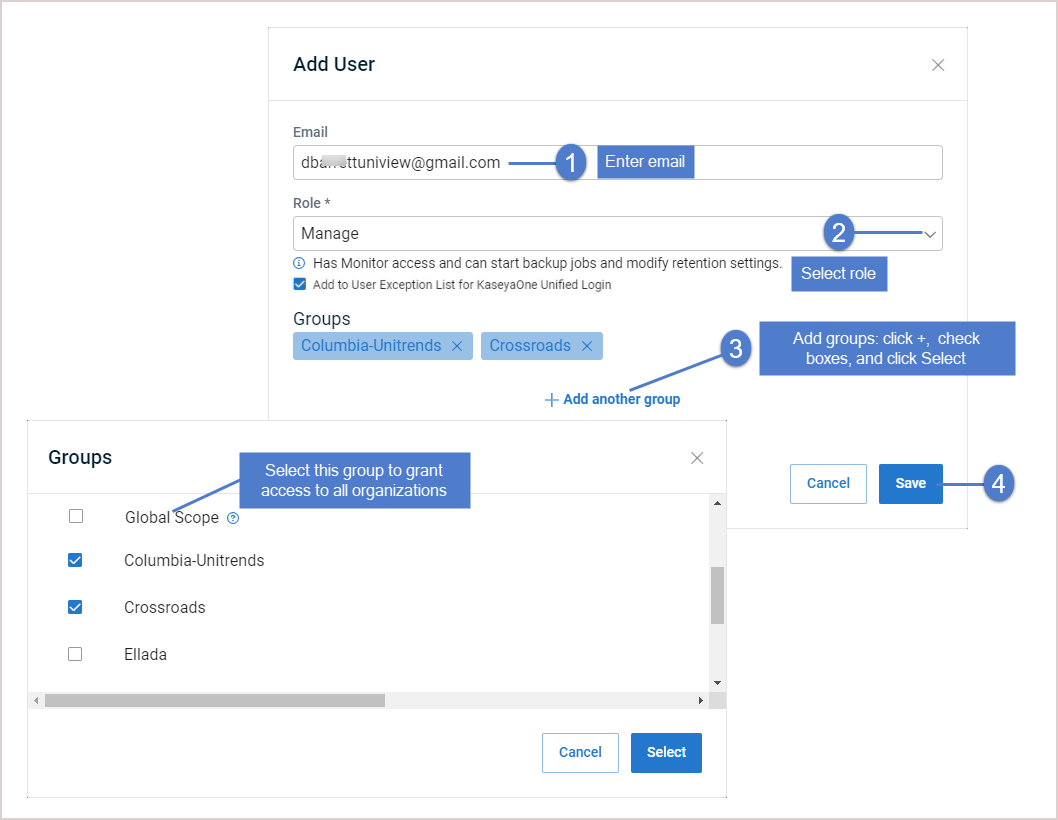
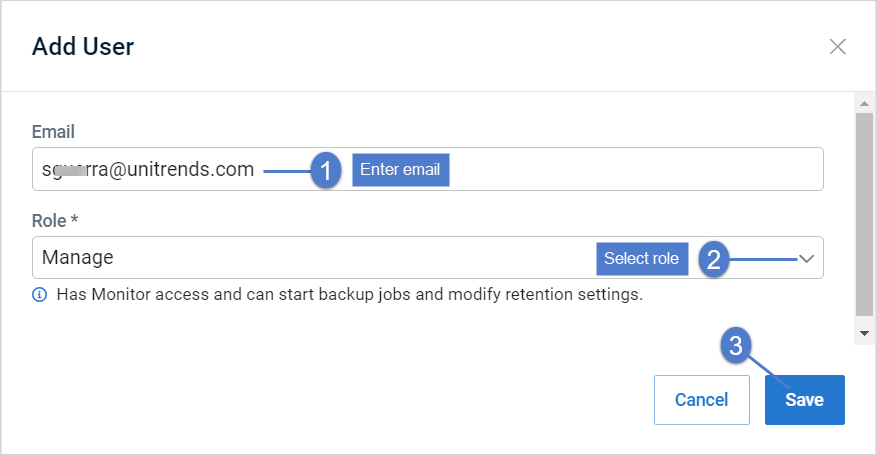
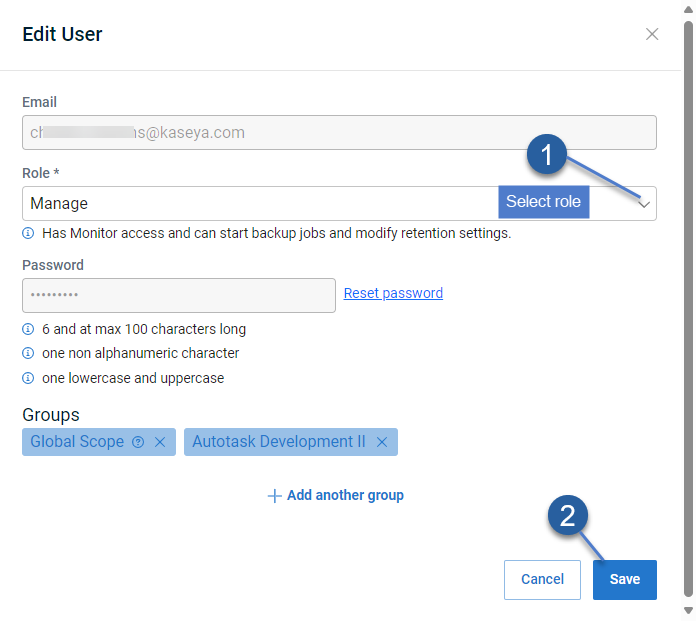
- Enter the user's email and role.
The role you select determines which features and procedures the user can run. (See About UniView Portal user accounts for details.)
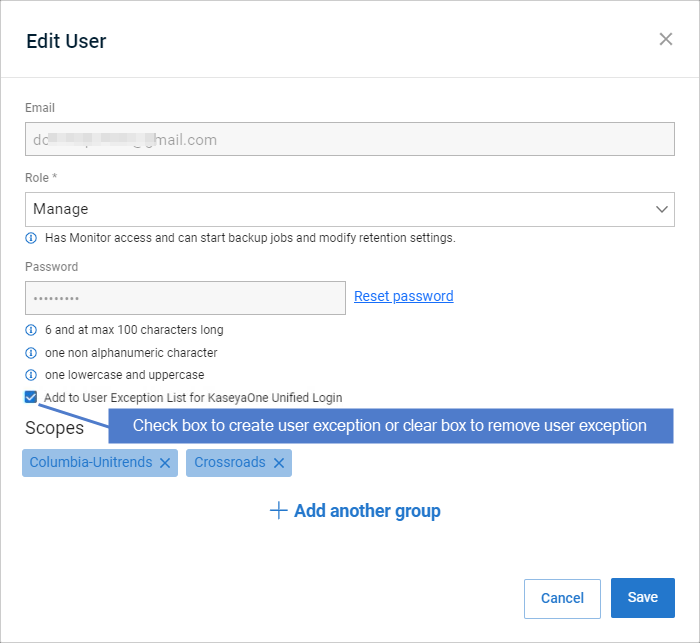
- (If needed) Check the Add to User Exception List for KaseyaOne Unified Login box if you require login with KaseyaOne but would like to create an exception for this user.
This option does not display if login with KaseyaOne is not required in your environment. For details, see To enable or disable Require Login with KaseyaOne.
NOTE This banner displays at the top of the page if Require KaseyaOne Login is enabled: 
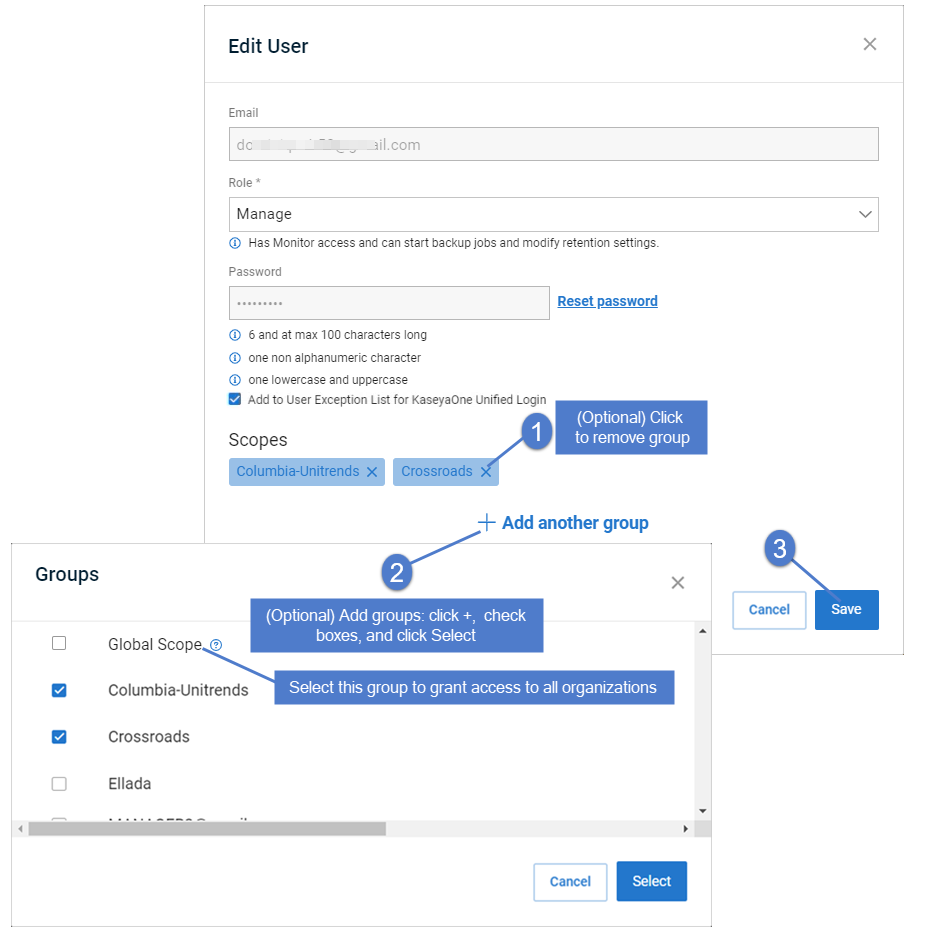
- (If needed) Add one or more groups:
- To manually assign groups, click + Add another group. In the Groups dialog, check boxes and click Select to assign selected groups to the user.
- To grant access to all organizations, add the Global Scope group.
NOTES
● The groups option does not display for the Superuser role as all groups are accessible to Superuser accounts. You must assign at least one group to non-Superuser accounts
● Assigned groups display but cannot be modified if the Access Groups feature is enabled as groups are assigned to users automatically by the KaseyaOne role-based access control feature. For details, see To enable or disable access groups.
- Click Save.
- Add groups example:
- No groups example (the Access Groups feature is enabled):
- The user is added in pending activation status and a Welcome to UniView email is sent to the user. The user must click the Activate Now button in that email within 48 hours to activate their account. When activated, the user's status changes to active on the Users page.
NOTE If the user's activation link expires, you can click the user's ![]() icon and select Resend Activation to send the user a new link.
icon and select Resend Activation to send the user a new link.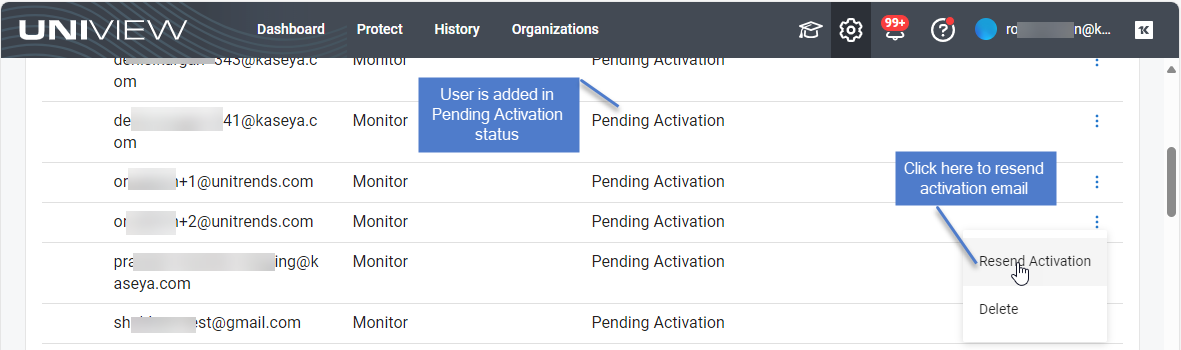
Use these steps to modify the user's role, groups, and whether the user has an exception for KaseyaOne Unified Login:
- Log in to the UniView Portal with an account that has the Admin or Superuser role.
NOTE As Admin, you cannot modify a superuser account or assign the superuser role to a user account.
- Click :
- In the Users view, locate the user, click its icon, and select Edit.
- (Optional) Apply a different role. Select a role, then click Save.
The role determines which features and procedures the user can run. (See About UniView Portal user accounts for details.)
- (Optional) Modify the user's Add to User Exception List for KaseyaOne Unified Login setting.
- Check the Add to User Exception List for KaseyaOne Unified Login box if you require login with KaseyaOne but would like to create an exception for this user.
- Clear the Add to User Exception List for KaseyaOne Unified Login box to remove the exception from this user.
- This option does not display if login with KaseyaOne is not required in your environment. For details, see To enable or disable Require Login with KaseyaOne.
NOTE This banner displays at the top of the page if Require KaseyaOne Login is enabled:
- (Optional) Modify group assignment. You can add groups, remove groups, or grant access to all organizations by adding the Global Scope group. Click Save.
NOTES
● The groups option does not display for the Superuser role as all groups are accessible to Superuser accounts. You must assign at least one group to non-Superuser accounts
● Assigned groups display but cannot be modified if the Access Groups feature is enabled as groups are assigned to users automatically by the KaseyaOne role-based access control feature. For details, see To enable or disable access groups.
- (Optional) Reset the user's password:
- Click Reset Password.
- Enter and confirm the new password.
- Click Save.
To disable a user
- In the Users view, locate the user, click its icon, and select Disable.
- Click Disable to confirm.
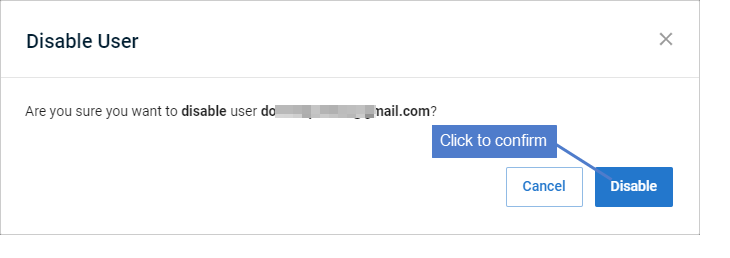
- The user is disabled.
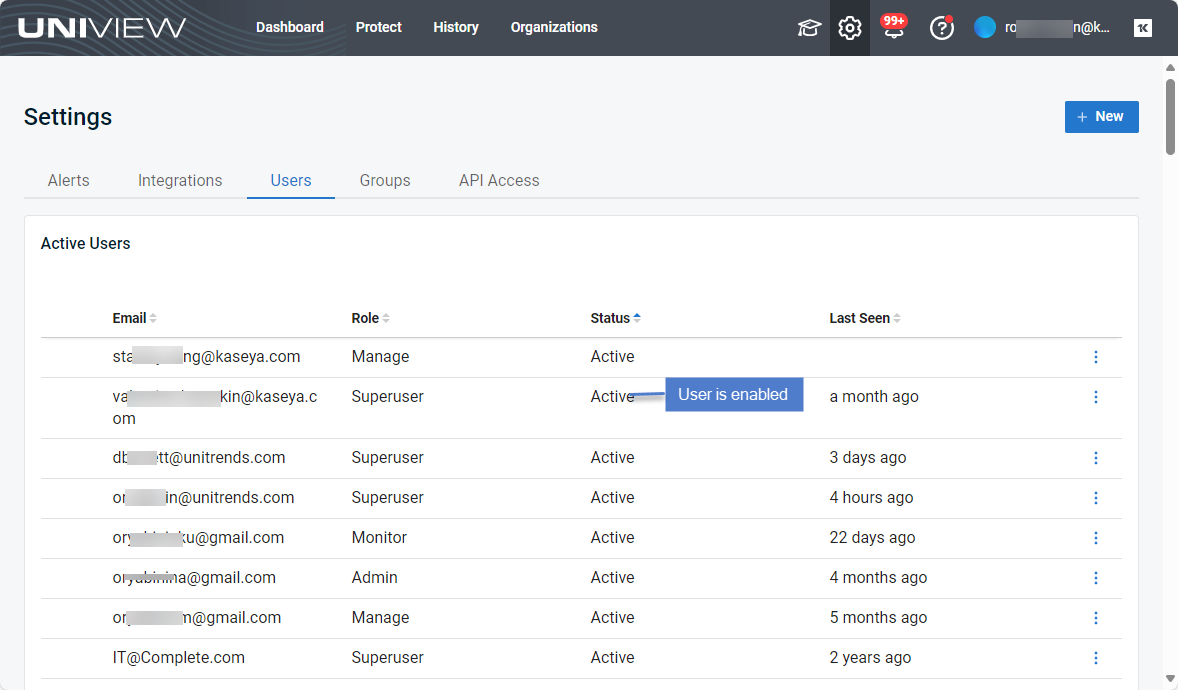
To enable a user
- In the Users view, locate the user, click its icon, and select Enable.
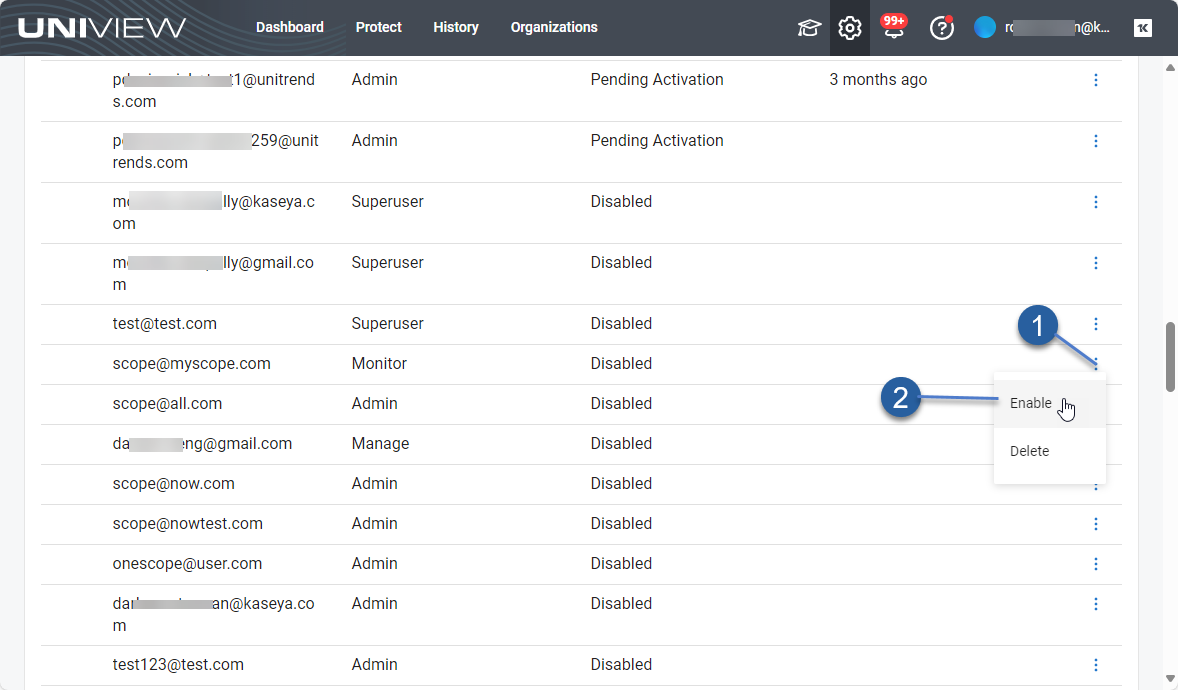
- Click Enable to confirm.

- The user is enabled.
NOTE If you have integrated KaseyaOne and enabled automatic user deprovisioning, deleting the user in UniView either deletes the user from KaseyaOne or deactivates the KaseyaOne user's access to the UniView module.
To delete a user
- Log in to the UniView Portal with an account that has the Admin or Superuser role.
- In the Users view, locate the user, click its icon, and select Delete.
- Type DELETE and click Delete.
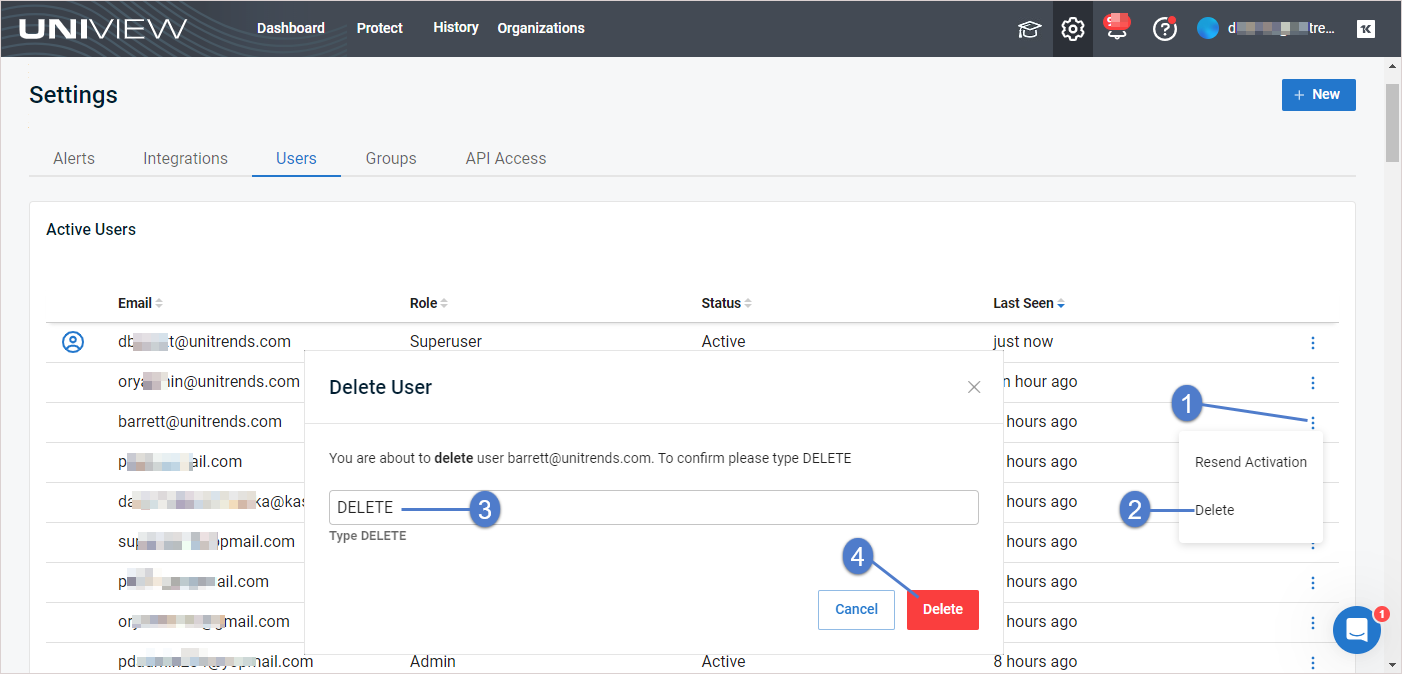
- The user is deleted.
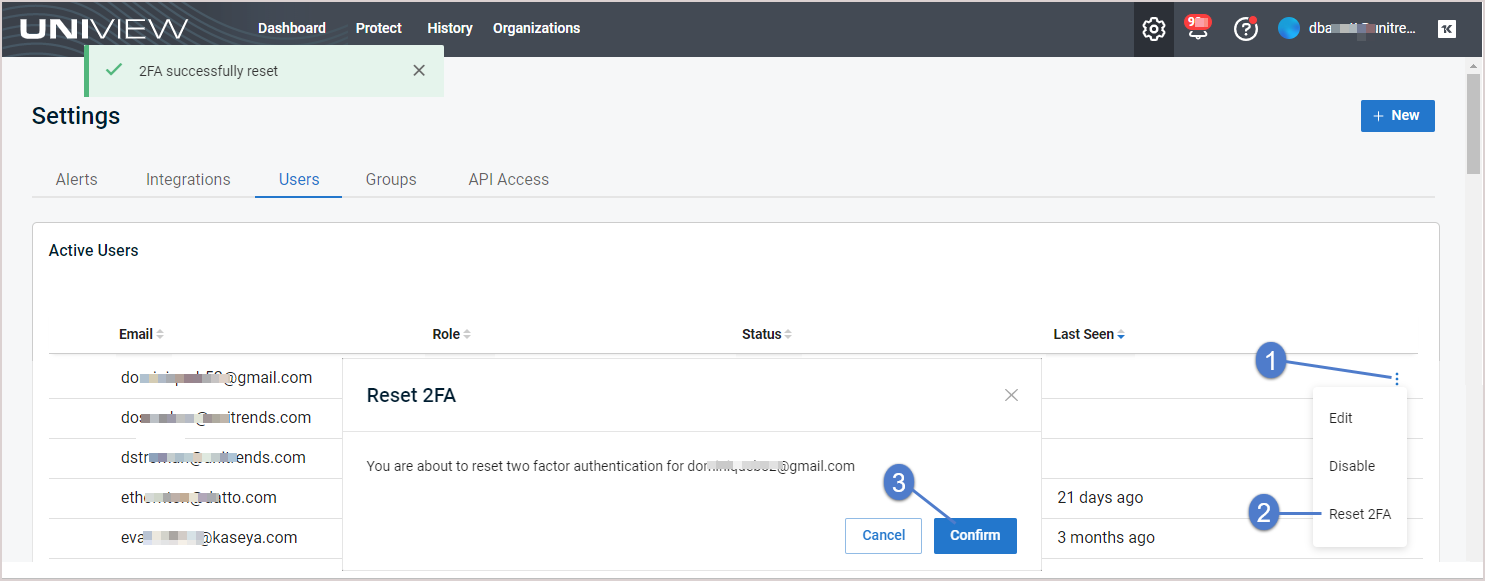
Use this procedure to remove a user's two-factor authentication (2FA). Use this option if the user has lost their device. Once 2FA has been reset, the user will be prompted to configure 2FA on their new device. Any recovery codes from the previous configuration are no longer valid.
To reset a user's 2FA
- In the Users view, locate the user, click its icon, and select Reset 2FA.
- Click Confirm.
When the user was added, a Welcome to UniView email was sent to the user. The activation link in this email expires in 48 hours.
To send a new activation link to a pending user, click the user's ![]() icon and select Resend Activation. The user must activate their UniView account within 48 hours of receiving this email.
icon and select Resend Activation. The user must activate their UniView account within 48 hours of receiving this email. 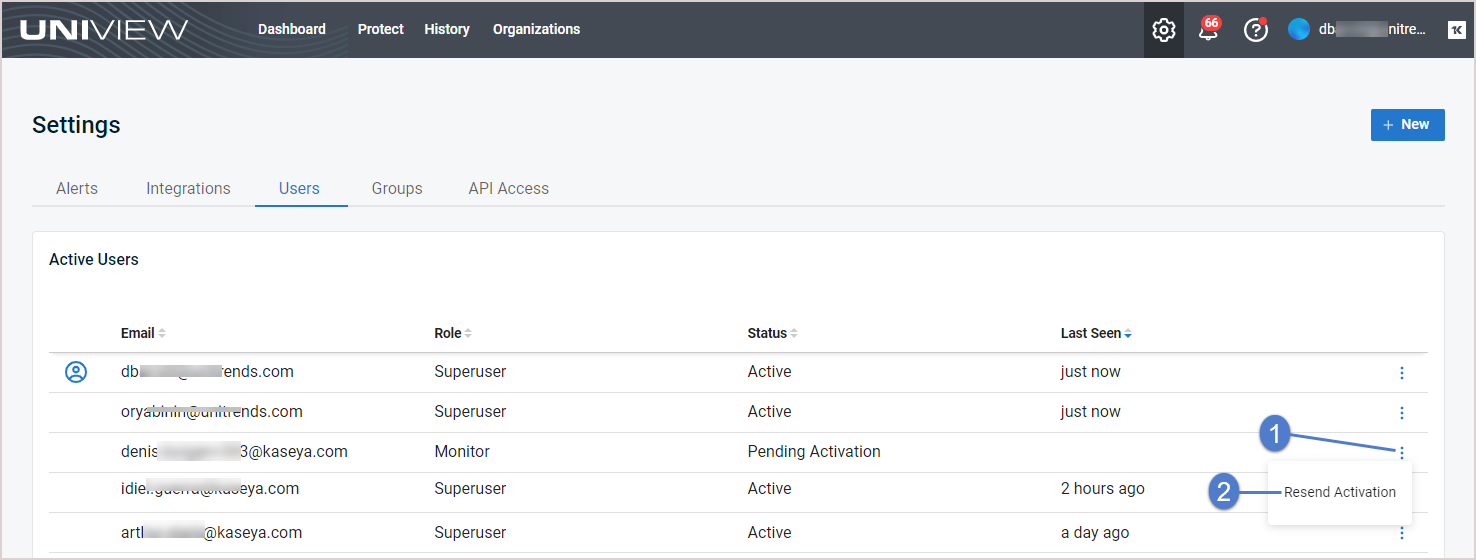
A group is a container of objects, such as users or computers, that a system uses to control access or permissions. In UniView, groups define which organizations are visible to a user in the UniView Portal. The method used to add groups and assign them to users varies by whether the KaseyaOne Access Groups (role-based access control) feature has been enabled in your UniView environment:
- The procedures in this topic are used to manage groups through the UniView Portal.
- If you have integrated KaseyaOne and enabled the Access Groups feature, UniView groups are managed by KaseyaOne. KaseyaOne groups display on UniView's Settings > Groups page but the page is now view-only. You can no longer add, edit, or remove groups through the UniView Portal. Instead, perform these operations in KaseyaOne (Admin Settings > Groups).
- For more on KaseyaOne's Access Groups feature, see To enable or disable access groups.
To control access to organization data in the UniView Portal:
- Each organization is assigned to one group.
- Each portal user account is configured with one or more groups. A user's group determines which organizations are visible throughout the UniView Portal.
- The groups option does not display for the Superuser role as all groups are accessible to Superuser accounts. You must assign at least one group to non-Superuser accounts.
NOTE A user logs on with both an assigned role (the functions they can perform) and an assigned group (the data they can see). Membership in a role and membership in a group are independent of each other.
Use the Groups view to manage groups. See these procedures for details:
NOTE To view and manage groups, the feature must be enabled for your UniView Portal user account. If needed, contact your administrator to enable this feature.
The Groups view displays all groups that have been added to your backup.net instance. 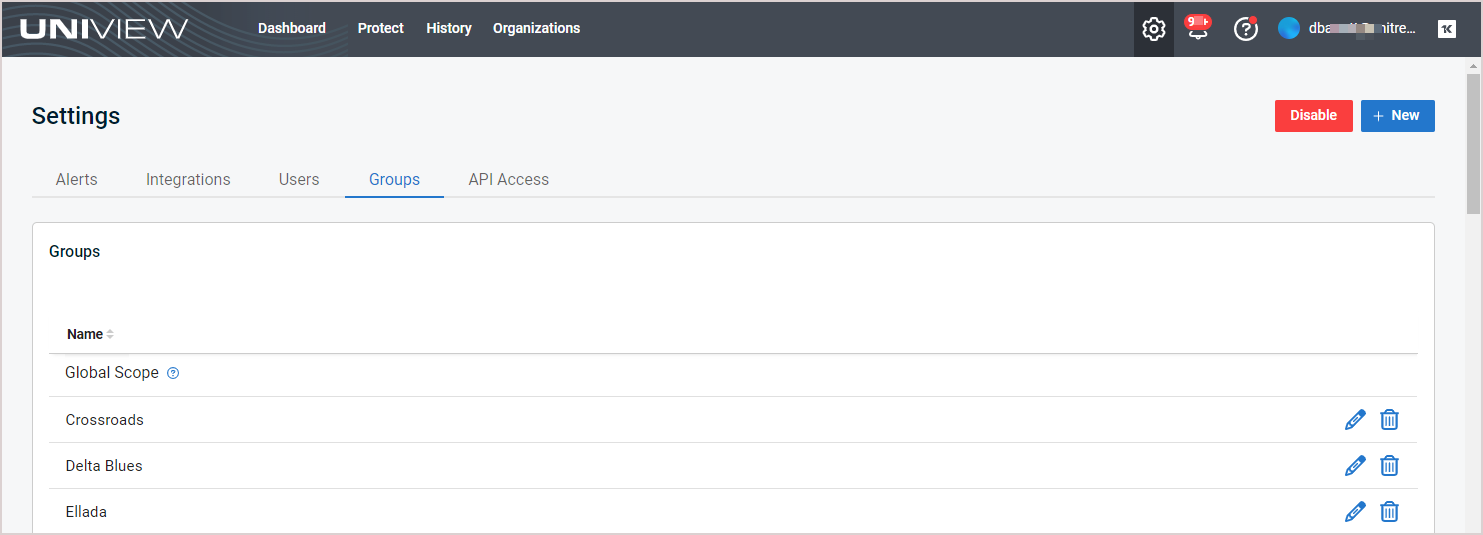
The following information is given for each group:
- Name – Name of the group.
-
 icon – Click to edit the group name. (Displays for superusers only.)
 -
 icon – Click to delete the group. (Displays for superusers only.)
NOTES
● Icons do not display if KaseyaOne's Access Groups feature is enabled. For details, see To enable or disable access groups.
● You must remove all users and organizations from the group before it can be deleted. Use Edit Organization to assign a different group to applicable organizations (see Editing an organization). Use Edit User to remove the group from applicable users (see Editing a user).
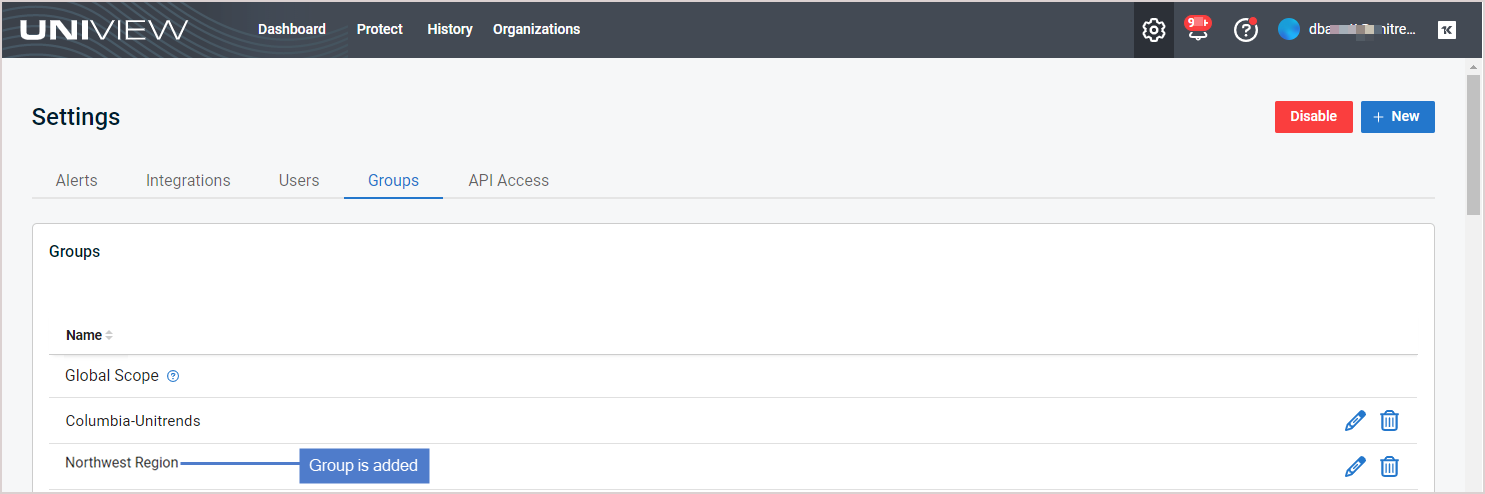
To add a group
- Log in to the UniView Portal with an account that has the superuser role.
- In the Groups view, click + New.
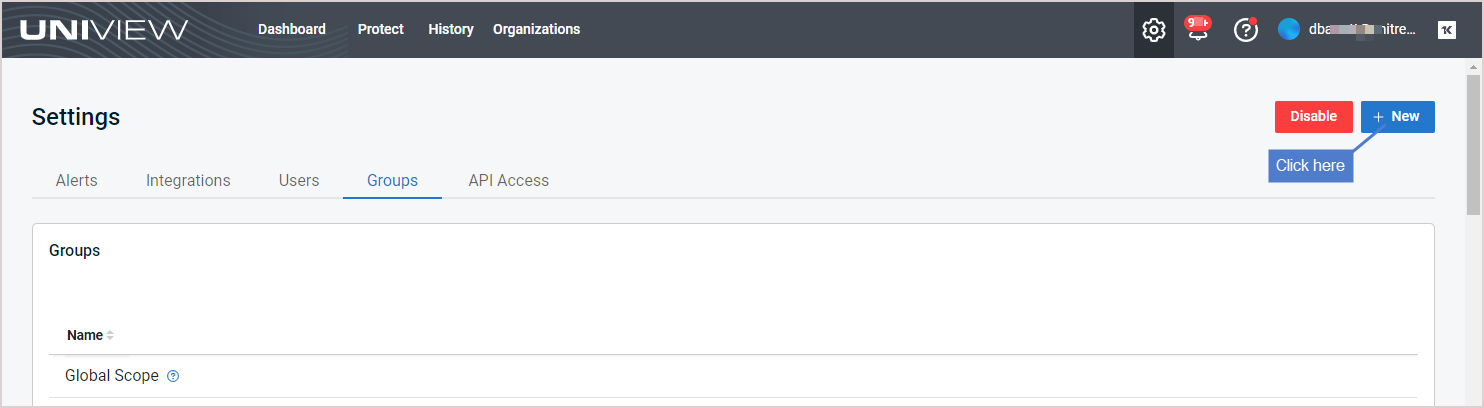
NOTE If KaseyaOne's Access Groups feature is enabled, the + New option does not display and you must add the group in KaseyaOne. For details, see To enable or disable access groups.
- Enter the group name. Click Add.
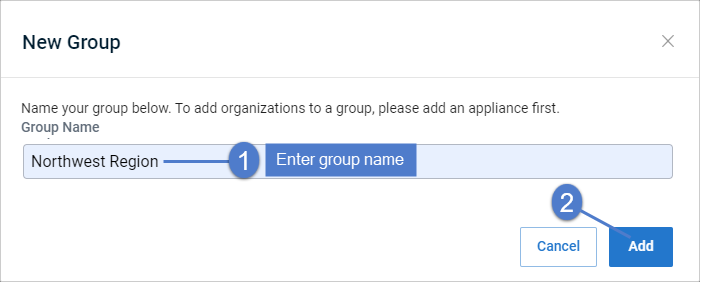
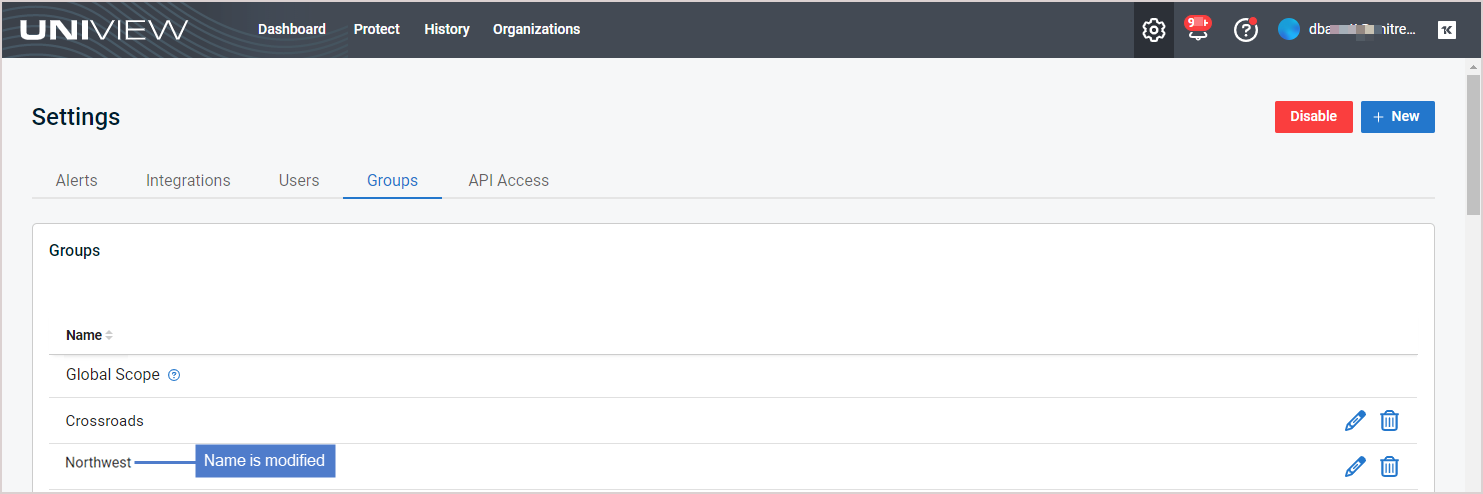
- The group is added and displays in the list.
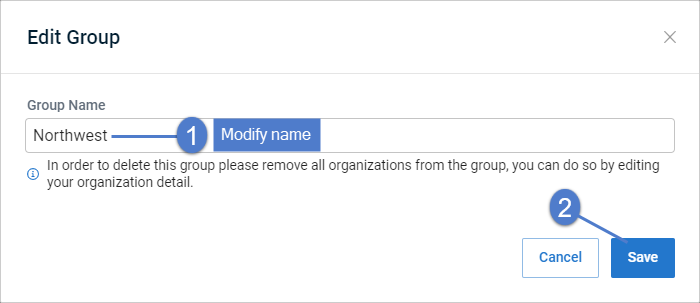
Use these steps to modify a group name:
- Log in to the UniView Portal with an account that has the superuser role.
- In the Groups view, locate the group and click its icon.

NOTE If KaseyaOne's Access Groups feature is enabled, the ![]() icon does not display and you must edit the group in KaseyaOne. For details, see To enable or disable access groups.
icon does not display and you must edit the group in KaseyaOne. For details, see To enable or disable access groups.
- Modify the group name, then click Save.
Use this procedure to disable or enable the groups feature for a UniView Portal user.
- Log in to the UniView Portal as the user whose groups feature will be disabled or enabled by this procedure.
- In the Groups view, click Disable or Enable, then click Disable or Enable to confirm.
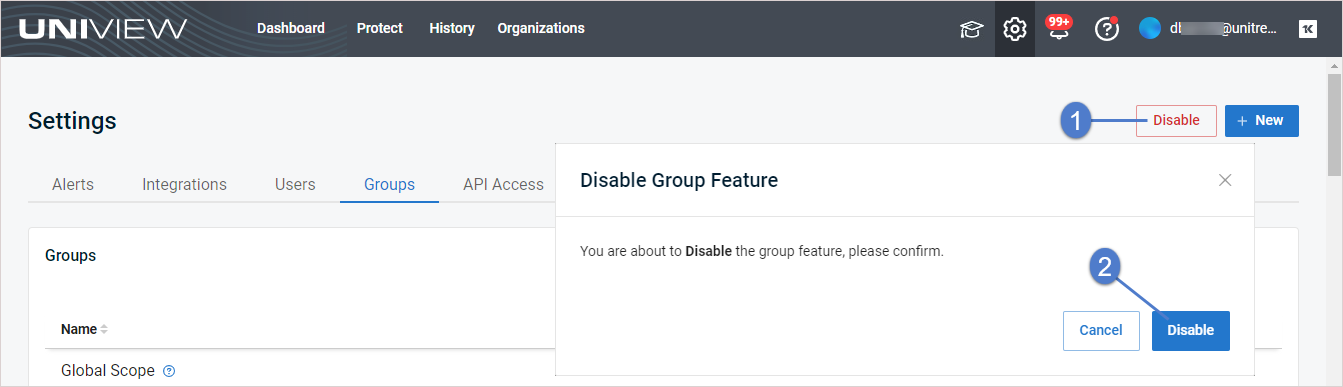
NOTE If groups are enabled for the user, the Disable button displays. If groups are disabled for the user, the Enable button displays.


